Monday, March 5, 2012

Thoughts on Salmon

Tavie sent out a call on the Family hotline:

Help, cooks!

I was putting an order in on Fresh Direct the other day for some large staples that I don't feel like lugging from the store, and I noticed that there was a sale on salmon fillets. (Verlasso farm-raised salmon 8 oz steaks, to be exact.) So I got a couple for me and Sean.

Problemo: I've never cooked salmon before.

So: how do I cook these things? I don't have a grill. I have a stove/oven, and a bottom broiler (that I'm not sure works - the last time I used it I got some steaks about 1/3 way cooked before the whole thing just shut off and I haven't tried it since.)

What's the best way to get some flavor out of these things with the tools I have at my disposal? And should I marinate them in something? (What?) How long do you cook 'em? Should I roast 'em? Bake? Poach? Pan-fry? Take them to Andrew's and make him grill them for me? (HAHA)

I could look up a recipe on the internet but I'm going to my personal experts first.
-- Tavie (rhymes with GRAVY)

Mom, Andrew and I replied the following:

From Mom:


Marinating fish is always a problematic issue because it's all too easy to overwhelm the fish flavor itself. But it's easy enough to do; just pop the fish into a zip-lock baggie and add a bit of sherry, rice wine vinegar, chopped herbs, lemon zest (your choice from the list) seal the bag and let it rest in the fridge for an hour or so. To cook - grill or pan fry.

Pan frying is dirt easy - a bit of butter and brown gently on both sides. Fish needs to be cooked through but not overcooked such that it separates into flakes by itself.

I tend to cook 3 min on a side for pan frying or 5 min if the piece is thick. In general, I cook salmon as plainly as possible - ie quickly pan fry in some butter. Then I top with unsalted butter and squeeze lemon juice on top. Or I ladle on some bernaise sauce which is sold fresh, ready to use in supermarkets here.

You can also easily make gravlax with salmon fillets in a glass dish (like a pyrex pie plate). Mix 2 parts sugar to 1 part salt (NON-iodised) ie 1/2 cup salt to 1 cup sugar (you don't want to end up with too salty fish). Sprinkle on bottom of glass dish, place 1 fillet in the dish skin side down (if skinless, formerly skin side down). Sprinkle a bit of ground pepper on the salmon and then a lot of the salt/sugar mix. Place a bunch of fresh dill on top (you can use dried dill but it's not as nice). Pat plenty of the salt/sugar mix on the 2nd fillet and pace that face down on the dill (ie skin side up). Sprinkle the remaining salt/sugar mix on that. Cover with saran wrap/cling film and place a flat plate on top of that. Add a heavy weight to press the whole thing down - a few large cans works well. Twice a day, remove the weights and saran wrap, flip the whole bundle of fish and dill over and put back the saran and weights. That helps it cure evenly. The gravlax is ready in 3 days depending on the thickness of the fillets. You'll see the texture of the fish change. So, when you are ready to serve, just scrape off the dill and other bits and wipe dry with paper towels. Place on a clean cutting board and using a very sharp knife held at an angle, slice very thin, flat slices - then eat!

This is a useful recipe site as they have photos and sensible instructions: http://www.cookingforengineers.com/recipe/132/Gravlax

Remember that recipes are just guides, not the law ;)

From Asti:


Further to my mother's recipe for pan-frying, if there is skin on your
salmon then fry the skin side first until it crisps a bit. I like to
do that and then use the fish in a salmon nicoise (lovely in the
summer). That would be salad leaves, green beans, hard boiled egg,
tomato, boiled new potatoes, black olives, some anchovies if you like
and serve with a nice vinaigrette.

To poach i put butter and white wine and some dill and juice of one
lemon in a pan. Maybe add a bay leaf. It should be enough to come to
about halfway up the fish but you want to bring the liquid to heat
before you add the fish. Liquid shold be almost ready to simmer when
you add the fish skin side down. Keep at this heat and let poach for
~15 minutes. You may want to add some baby asparagus when there is
5-10 minutes left. Note: no need to turn and it is quite normal for
the skin to pull away in the pan when you lift to serve.

I would serve with hollandaise sauce and boiled new potatoes.

And from Andrew:
Preheat the oven to 350. Slice a bunch of lemon rings and coat the area the salmon will sit on in the pan/cassarole dish/whatever. Place salmon atop lemon. Cover top of salmon with a few more lemon slices, but not completely covering it- just a few. Seal whole pan in aluminum foil. Place salmon into oven. Bake for about 10 minutes per inch thickness. Five minutes before finishing, take salmon out of oven. Remove foil. Remove lemon slices from top. Heap spinach on top of salmon. Put foil back on. Place salmon back into oven. Let salmon cook the remaining 5 minutes, potentially slightly longer since the salmon may have cooled while out of the oven. Do you have a meat thermometer? Worth buying. Anyway, the spinach will have wilted and stick to the top of the salmon, looking almost like a green glaze. Remove salmon from the oven and enjoy.

Variants can include putting a little bit of white wine in the bottom of the pan to help keep the salmon moist and flavor it.

Friday, March 2, 2012

Kangaroo Tenderloin


Yes, you read that right. I made kangaroo tenderloin medallions tonight. No, they aren't difficult to make at all, although you need to keep on your toes.


Kangaroo is not domesticated, but instead is still hunted in the wild. The reason is simple; they die when attempted to be herded. Still, when you look at the meat, it is fairly astonishing. As you can see above, the color is a very livid purple. About the only way I can describe it is it is like dark meat on fowl. And this is the tenderloin no less.

I'm going to say this again, but it can not be stressed enough. Kangaroo is exceedingly lean. Look at the pictures I post here- show me one tiny piece of fat. There isn't any. Well, technically there is, but it is easily under 3%. This is about as lean as it gets.

Now, you see that purple, you hear about kangaroo, you worry about gameyness and flavor, right? Well, you don't need to so much. The gameyness flavor comes from two factors- the age of the Roo and the length of time since it was killed. Most butchers will have the meat frozen, which means that the length of time is no longer an issue. And hunters pretty much go for the young Roos, so that isn't a big deal either.

I'm not one of those people who like gamey meat. I had no problems with kangaroo. The flavor is almost exactly that of a very nice steak. Almost. There is a subtle background hint of a flavor which is different, but many people simply will not be able to tell the difference. Which is fine, as kangaroo meat is actually extremely healthy.

So, you have your kangaroo tenderloin medallions, you are reassured about the gameyness factor, you just want to eat the fucking things. Now what?

I set the medallions on a plate and poured all the extra juice I had over them. Then I sprinked salt on top of the meat. You see I had a fair amount of meat. For this, I sprinkled three generous pinches of simple Morton's salt. Why no sea salt? I don't have any at the moment.

I set the meat aside on the counter and left it alone at room temperature for five hours. You can eave it overnight in your fridge if you cover it. This allowed the salt to draw moisture out from the meat, form a brine, then become re-absorbed by the meat, flavoring the meat all the way through. Plus, the extra juice I poured on top was also almost completely absorbed. After five hours, the top of the meat was dry to the touch, but that is okay.

I heated my griddle with a generous amount of olive oil spread onto the grill. Again, I emphasize the leanness of the meat. Because of this, the meat will dry out if you are at all careless with it. This is a meat which can NOT be cooked past medium at the most, but really should be cooked to rare/medium rare.

But how to achieve this best? The secret is frequent flipping. Yes, they always tell you to flip only once. You know what? That's bullshit. Complete and utter bullshit, as you will see in a moment. Flip as much as you like. These tenderloin medallions were flipped around once per minute. This allowed them to cook from both sides at the same time.

Note: the top of the steak where the salt was sprinkled will be a darker bluish-purple, while the bottom will be redder, as seen in the above picture. While cooking, that bluish-purple color does not necessarily go away 100%. Do not be fooled into thinking that this means that the meat is still raw. Just keep flipping.

I cooked these for a total of roughly ten to fifteen minutes. Yes, I know that is a large range, but I don't remember exactly the time. Plus, my grill isn't exactly even of heat, so if you have a better setup, ten minutes should be fine.

Your beautifully cooked steaks will need to rest a full ten minutes. As always, don't fuck around with that time- it allows the juices to flow from the interstitial spaces back into the cells, keeping the meat juicy and moist.

The final product? See for yourself:

Only needs to be flipped once? Fuck you. That is one of the most beautifully rare steaks I have ever eaten in my life.

Friday, January 6, 2012

(Mostly) Around The House Stuffed Peppers

I've wanted to make stuffed peppers for a while now, haven't made them in years. As usual, I don't have everything that I need, but I put together what I had from around my kitchen- mostly. I say mostly because I did go and buy the peppers and the chopped meat especially for this dish.

You will need:

several teaspoons salt
several teaspoons pepper
1 cup white rice (I use Basmati)
several tablespoons of butter
water
6 bell peppers (traditionally green, I used a mix of green and yellow because they only had two green left.)
1 small onion
1 clove garlic (I used a clove of smoked garlic, which was all I had)
1 tiny can of tomato paste
~1.5 pounds of chopped beef
oregano (about a teaspoon, dried)
basil (about a teaspoon, dried)
1 egg
Worcestershire sauce

First thing's first. Preheat your oven to 350 degrees. Have a large casserole dish (large enough to fit all of your peppers upright inside) on hand. Put a fairly large (6 quart) pot of salt water on the stove to heat. Note that this should be fairly lightly salted, you don't want it to be salty like you make pasta in- it will turn your pepper into pimento if you do that.

I recently figured out a trick when it comes to rice. I hate washing rice. It's not that its hard, but it takes forever, your hands get pruney, and you're never quite certain that you've gotten all the starch washed off. Here's the trick. Get a large, deep mixing bowl. Deep is important. You don't want one of those shallow but large ones. Just a big, classic deep mixing bowl. Put one cup of rice in the bowl. Stick the mixing bowl in your sink, under the faucet. Aim the faucet into the middle of the rice and turn the faucet on, hot. Why hot? Because starch is more soluble in hot water than cold. What *should* happen (and you will need to shift the bowl/faucet around) is the water will hit in the middle of the bowl and spread out and come up the sides. A current will be set up so that the rice will flow with the water in a cycle, constantly rinsing it, no need to stick your hands in. After a few minutes, the water should run clear. Bam, you're done.

Wash 1 cup of rice and drain. Add it to 1 1/2 cups (there will still be a little water left in the rice, which is why I don't say 1 3/4 cup) water and a tablespoon of butter in a medium saucepan and put on a high heat until boiling. On boiling, turn the heat down very low so it just simmers and cover tightly. After 10-15 minutes, it should be dry. Fluff with a fork and set aside.

While the rice is cooking, cut the tops off of the bell peppers, putting the edible parts of the tops aside, and clean the insides of membrane and seeds. Once all six are done, place them into the pot of water. Hopefully you didn't take too long about this, so the water should still be pretty cool. This will be brought to a boil and allowed to boil for five minutes. However, this much water takes a long time to get to a boil, so by the time the peppers are ready to be fished out, you should be ready to use them.

Take the edible parts of the top of the peppers and chop them up. Also chop the small onion, and the single clove of garlic (chop this fine but no need to mince it, or you can crush it if you like). In a frying pan, melt two tablespoons of butter. Add the peppers, onion and garlic and stir them a little to make sure everything is nicely coated and cook for five minutes until tender. Add the tiny can of tomato paste, re-fill the can with water and add the water to the frying pan. Stir until the tomato paste is evenly incorporated into the vegetables. Add a teaspoon salt, teaspoon pepper, the oregano and basil and stir. Let that sit with an occasional stir for 5 minutes or so- you want it to be thick, but not play-doh thick. Like a good tomato sauce in thickness.

In another mixing bowl, whip the egg until fluffy. Add 1 teaspoon salt, 1 teaspoon pepper and whisk it together. You want to add the Worcestershire sauce now. How much? I add a tablespoon or two- but I have low sodium, so if you have regular you may want to add less. Just use a few generous dashes, you should be fine. Add the chopped meat and the rice (should be finished cooking by now). Use a lean chopped meat, you don't want lots of fat oozing through the peppers, making it greasy. Add half of the tomato-mixture from the frying pan. Mix by hand. As with all chopped meat, you don't want to over-mix it, but you want it fairly homogeneous. It won't take too long.

Fish the peppers out of the water and put them upright in the casserole dish. Fill them with the meat mixture by hand- you can add it in without touching the pepper if the pepper is still really hot. Top with rest of the tomato mixture.


Pop into your hot over for an hour, then take out and let cool. Eat and enjoy! Hands down best stuffed peppers I've ever had. And the yellow peppers? I'm never going back to green again, much sweeter and more flavorful!


Edit: I made an absolutely enormous batch for a party last night and found something interesting- the amounts don't seem to scale linearly. I made a little over three times the number of peppers (red, yellow, and green) and made three times as much filling, but had enough for a good 4-5 more at the end. I'm not really sure why this is, but the green peppers I got were a little bit on the small side. So, I guess, look at this as working for fairly large bell peppers.

Saturday, December 17, 2011

Maple Ice Cream

I had some maple syrup sitting around from the last time I was in Vermont- Fancy grade, naturally. I don't use it all that often, but it is just so lovely to have. So I figured, I'm goign to be going back soon enough, time to use some. How? Maple Ice Cream.

There is NO cooking involved here.

Ingredients:

2 large eggs
1 1/4 cup maple syrup
2 1/2 cups heavy cream
1/4 cup milk 9full fat. You try this with skim? Fuck you)

Whisk the eggs until fluffy, then whisk in the maple syrup. It's a lot, because the maple is both a flavor as well as a sweetener, replacing the sugar which would normally be used. Once the maple is incorporated, add the heavy cream and then the milk. Place into the ice cream maker of your choice. Feel free to add chopped walnuts for maple walnut ice cream.

Note that because of the amount of maple, you get a strong maple flavor but a very sweet ice cream. The result is an ice cream that you will want 1-2 scoops and no more. But that scoop or two is just maple goodness.

Tuesday, December 6, 2011

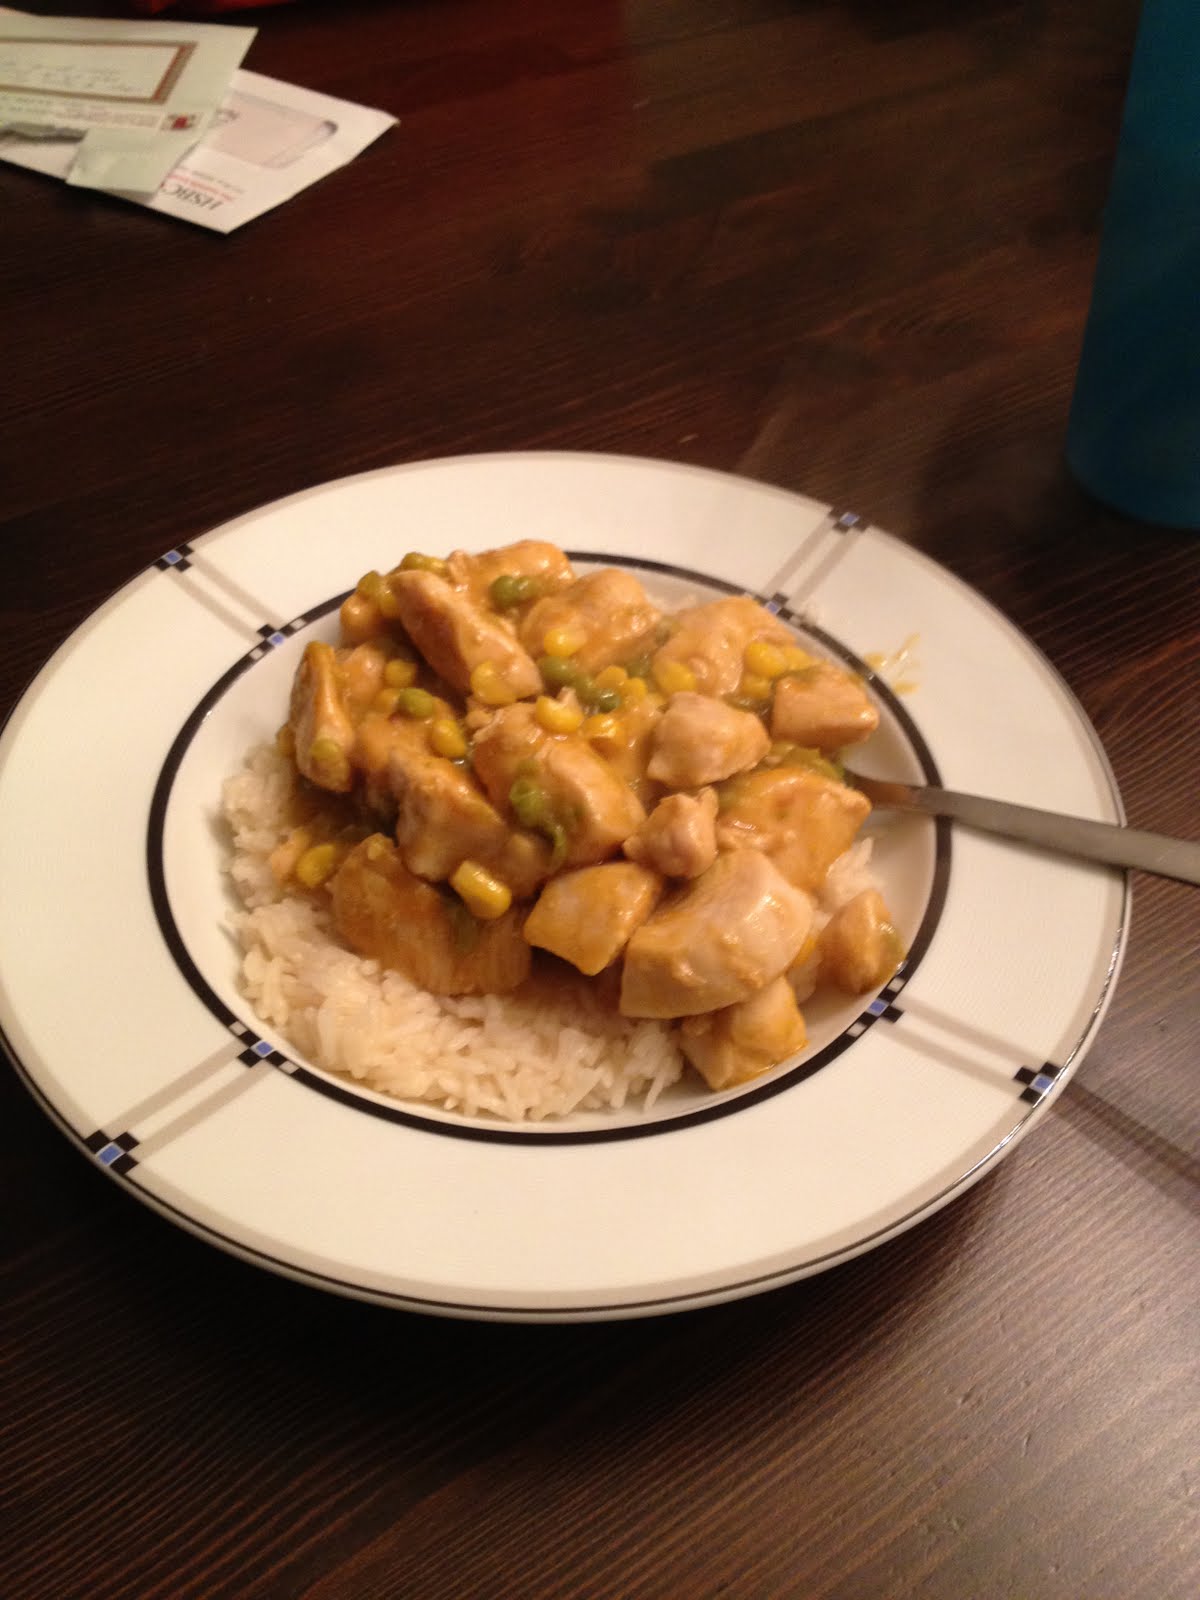
General Goldberg's Chicken

So I came home tonight a little after 10. I had an exhausted hour to cook dinner +lunch for tomorrow for my wife and myself, four boneless, skinless chicken breasts and little else in the cupboards. All this coupled with a growing loathing of chicken breasts in all the ways I normally make it.

I decided to explore my fridge and cabinets for ingredients, and made a sort-of General Tso's Chicken from things laying around.

Put up a pot of rice to serve the food over while you cook.

Cut the breasts into cubes and saute them with some olive oil.

Meanwhile in a small sauce pan, heat a small amount of water- 1/3-1/2 cup. If you are like me, your brown sugar is a solid lump. Break off a few pieces and drop them into the water, stir to dissolve.

Add the following to the sauce pan:
ketchup
red pepper flakes
rice wine vinegar (don't be scared- rice wine vinegar is extremely mild)
some lemon juice
juice of that one naval orange sitting in the fruit drawer in the fridge.

Bring back to a boil. Add a cup and a half or so of water and bring to a boil again. Taste it. Even with that water added, it should be fairly thin but flavorful. Don't worry about the thinness, we'll get to that.

Drain the chicken and put back into the pan. Pour the sauce over it. separately mix some flour and water and add it to thicken the sauce, stirring it in. Add a jigger or two of some cheap scotch (I had White Horse) and let simmer for a minute or two. Add a can of peas and some corn. Bring back to simmer, still stirring. It should be thick, tasty, and smell awesome. Serve over rice.


Saturday, November 12, 2011

Wienerpunsch

Some years ago, my extended family invited me to go with them on a trip to Vienna. Why? Just to be nice. We were there for Thanksgiving, and the Weinachtmarkts (Christmas Markets- like at Union Square, but EVERYWHERE) were open in full swing. Everywhere were hanging meats, chestnuts roasting in big kettles, small chachkas and gewgaws. It was cold, unbelievably cold for mid-November. It felt more like February. One thing I noticed to my surprise was the frequncy of men wearing hats- real hats, not baseball caps. That and furs. Women everywhere wore furs, real ones. But naturally, nothing quite warms like real fur, but here in the states, people either wear fake fur coats, or very rarely wear real ones because of the stigma against real fur. Which is stupid, in my opinion. I eat the meat, why not wear the skin? In fact, it seems a bit of a waste, but whatever.

Of course, I've always wanted to club my own baby seal, but that's just me.

In any case, one of my favorite things to do was wander the streets of Vienna, gradually growing colder. When I got cold enough, I would just stop at a nearby Punsch stand and buy a mug of Punsch, then be warmed up and walk on a little further. Punsch is punch, of course, but they had dozens of flavors and varieties, all of it hot, refreshing, and nicely alcoholic. I finally asked what went into making them, and I was told that they used a nice red wine, some tea, and fruit juice. Hunh, thought I. Not what I expected.

I miss Punsch, so I decided that tonight I'm going to make some. My recipe will be as follows, although possibly halved. When you drink it, think of the beautiful city of Vienna, where I smoked in the Natural History Museum.

12 cups red wine
4 cups of black tea
2/3 cup of Austrian rum (80vol% alcohol), if you have to use carribean rum, take 1 1/3 cup
6 cups fresh orange juice
1/2 cup sugar
2 sticks of cinnamon, a few cloves
some orange peel

Put everything into a big pot and gently heat but do not boil. Remember that alcohol boils at 79 degrees C, so if you heat it too much, you'll drive off all the lovely alcohol.


Edit: The verdict is in- both Kirsten and I think it tastes exactly like what we had in Vienna. I made up the black tea (Lipton's) and set it aside to steep. Once it had, that went into an enamelled cast iron pot. Still ery hot, but nowhere near boiling. Heat was turned on underneath and ~ 2 liters of a red cabernet was added (an inexpensive box wine). I dumped in a fifth of Bacardi silver (200 mL). I was running low on space by that point, so I only added ~2 cups or so of orange juice (poured in without measuring). 1/2 cup sugar was on the money, 2 short but fat cinnamon sticks and 5-6 cloves were added as well as the zest of one orange. Because the tea was so hot, this required very little heating to get it where it was going, and it was greatly enjoyed by all on such a cold night as this. I will definately be making it again in the future!

Saturday, September 24, 2011

Mayonnaise - in praise of the Real Hellmans

Oh lord, I'm down to the last 2 tablespoons of Hellman's Mayonnaise - real honest to goodness, New York bought Hellman's mayonnaise.

One of the horrors of "localisation" of brand foods is what is done to Hellman's Mayonnaise in the UK. Obviously it's what the company believes is preferred by British consumers. But as I'm not, I find the UK product completely alien. I've been lucky in recent years to have visiting family and friends haul over jars of Hellman's when they visit. But now I'm running on fumes so I'll have to make homemade American recipe mayo now.

Btw: Commercial mayonnaise sold in jars originated in New York City, in Manhattan's Upper West Side. In 1905, the first ready-made mayonnaise was sold by a family from Vetschau, Germany, at Richard Hellmann's delicatessen on Columbus Avenue, between 83rd and 84th Streets. In 1912, Mrs. Hellmann's mayonnaise was mass marketed and called Hellmann's Blue Ribbon Mayonnaise.

Here's the basic recipe. Details to follow after I make a batch tomorrow with my stick mixer (immersion mixer) and document the process.

2 large egg yolks
1 Tbs. lemon juice
1/4 tsp. salt
pinch of white pepper
1 cup oil - this should be a "tasteless" oil like sunflower, safflower, grapeseed, or canola (rapeseed)

Important: All ingredients must be at room temperature before you start this recipe.

Traditional way to make mayo:

Add first 4 ingredients to a bowl and whisk until combined and light.

Whisking vigorously add the oil 1 drop at a time, whisking after each drop until it disappears into the mixture (about 8 strokes/2 seconds).

After you have added about 1/3 of the cup of oil, and the mixture has thickened a lot, start adding the rest of the oil in a slow very thin stream.

When all the oil has been added and the mix is thickened - taste and add additional lemon juice and seasoning to taste, whisking it in smoothly.

You can add crushed/mashed garlic to the mayo to create aioli or minced tarragon or other hebs. The add-ins are endless.


My way to make mayo (quick and easy)

I use a stick mixer and a narrow cylindrical container to make mayo in under 30 seconds.
I'll add details and photos tomorrow afternoon.

And..in later news...my daughter has generously offered me her last jar of US Hellmans Mayo which I will eagerly collect tomorrow.