I went and bought myself one of those expensive ice cream makers that has an active refrigeration unit. Well, I had to justify it somehow. I tried one of the recipes in the provided recipe book but only found that the recipes were so sweet that I had to just dump everything down the sink, to my dismay. So, I figured to hell with it. I looked around for something nice to make ice cream with. And then I remembered that bottle of Amarula that my sister kindly left with us the last time she was here, and an idea formed.
1 cup heavy cream
1/8th cup sugar
1 teaspoon vanilla extract
1/4 cup Amarula
Combine in bowl and stir gently to fully
Dissolve sugar. Use in ice cream maker per your machine's instructions. You will get lovely Amarula flavor from these proportions. Be wary of adding more, as the increased alcohol content may prevent it from freezing fully, whereas this recipe will do so beautifully.
Friday, March 8, 2013
Saturday, February 2, 2013
Choucroute
On a cold February day, there is little so comforting as choucroute. It's tasty, healthy, hearty, and hot. Simply put- it's a bunch of meat cooked in sauerkraut and wine.
Now, before you go off reeling in disgust, keep a few things in mind. Sauerkraut here in the states tends to be associated with tounge-puckeringly sour flavor. That tends to come from industrially processed sauerkraut, especially the liquid. Remember that sauerkraut is meant to be pickled, but most sauerkraut you buy tends to be canned. The canning process cooks the kraut in addition to the pickling, which will really affect the flavor and texture. Choucroute will also have you rinse the kraut, which leaves you with a dish much, much more mild in flavor. That said, sauerkraut, even rinsed and with much of the pungency cooked out of it, still has a slightly sour taste. But it's worth a try.
For myself, I was off in New Jersey with my father, learning to drive. After a few hours of not hitting anyone, we were both hungry. We went to the nearby town where my father knew there was a German butcher. The smells inside were intoxicating, and my father and I agreed that choucroute would be a lovely dinner. He kindly paid for ingredients and I agreed to cook, it seemed fair.
One nice thing that I can't recommend enough: if you have a German butcher who makes his own sauerkraut, buy it from them. We did, and the flavor difference is immediately notable. For one thing, you get a little more flavor from the cabbage, but it is also less pungent than normal kraut because less vinegar is necessary for preservation. Ours came out of the barrel with very little liquid. Combined with how mellow it was, I decided not to bother with rinsing the sauerkraut. If you are buying yours from the store- and there's absolutely nothing wrong with that- be sure to rinse yours.
Substitutions: I have *loads* of celery seed, as you may have been able to tell form my last recipe for celery soda. The traditional ingredient is juniper berries, of which I have none. However, I'm not the worlds biggest fan of juniper, finding the flavor a tad pungent and overwhelming. Celery gives you the gorgeous aromatics without the pungency, so I like it as a substitute. Feel free to change as you wish.
As for the meats: look, this is a flexible enough recipe that you can throw whatever you like in. Some people use fish. Some people use beef. Things that need to cook longer should be put in at the beginning (pig knuckles and such) while the wurst and pork chops should be put in at the end.
The wine: don't use "cooking" wine. Use something inexpensive but nice- Riesling is traditional- but any dry white wine will do.


Had I not had two pounds of somewhat fatty uncured hickory smoked bacon from dartagnion, I would have chopped two large onions and sauteed them in a pot with a large amount of goosefat (alt: duck fat, pork fat). However, with how fatty my bacon was, I sauteed the bacon first until it was almost fully cooked and all the fat had rendered out, then added the chopped onions (chopped to about 1 cm square) and cooked them until soft. To this was added rosemary, thyme, a bay leaf, a quarter teaspoon celery seed, 2.7 pounds sauerkraut, a half dozen small peeled potatoes, and a bottle (750 mL) of white wine. Reduce heat to very low, cover, cook for an hour and a half. Add three generously sized smoked pork chops, four bratwurst, four knockwurst, four weisswurst. Cook a further 20-30 minutes. Remove the meat. Drain sauerkraut. Serve the meat with the kraut on the side.
Pictures will be added later, as I'm still cooking this as I type.


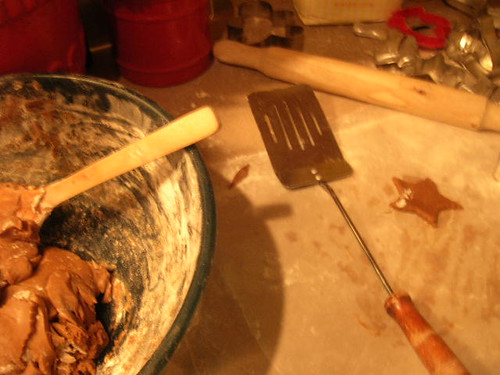
Thursday, January 17, 2013
Principles of Meatloaf
I recently received an email request from my son Adam for my meatloaf recipe and have been delaying my reply because, as you may have guessed, I make meatloaf without a recipe. I'm sure most of us have a list of basic dishes they've made all their life, learned from watching a grandparent, and have never written down the ingredients and amounts especially because it all changes slightly each time depending. But there are some general principles and standard ingredients which will reliably produce a savory meatloaf with the correct remembered taste. So here's my crack at it and feel free to adjust to your own taste.
Ingredients;
2 lbs Ground beef
breadcrumbs - preferably Progresso Italian Style or Colonna Italian Style
Onion - finely chopped and sautéed in butter until transparent and slightly brown
2 cloves garlic finely minced and added to the onions for the last few minutes sauteeing
Mushrooms - chopped and sautéed in butter
eggs (approx 1 egg per pound of ground beef)
ketchup
parmesan cheese - grated
milk to moisten breadcrumbs
salt, pepper, herbs and spices, chopped parsley
Loaf pan - 2lb size usually around 7½ x 4¾ x 3½ inches deep
Basically, I add a small amount of milk to the breadcrumbs and set aside to allow it to be absorbed.
Meanwhile, I chop the onions and mushrooms and saute them in butter.
Put the ground beef into a large mixing bowl and dump the other ingredients on top of the beef.
* Add herbs and spices, salt & pepper - how much depends on whether you use plain or Italian flavoured breadcrumbs. Do give it a few good grinds of black pepper. I hate bland food. Be careful what you add as some herbs have very strong flavors and can easily overwhelm your dish ie oregano, thyme.
Now GENTLY mix it all with your hands. (You did wash your hands carefully with soap and water first, right?) You want everything to form a soft but uniform mix. Do not overmix, squeese, or beat the ingredients - texture is very important.
Place the mix into a loaf pan and bake for about 1 hour at 350F. Check for doneness - meat should be nicely brown with crispy bits at the edges and juices run clear. If needed, leave in another 15 min and check again.
When done, allow to sit for 15 min or so to settle and then serve hot. Can also be allowed to cool and eaten cold. Makes very nice sandwiches.
If you want an actual recipe - here's one I absolutely love (and it's very similar to mine): http://thepioneerwoman.com/cooking/2010/09/my-favorite-meatloaf/
Wednesday, January 16, 2013
Celery Soda
New York Jews love it. Everybody else hates it. Celery Soda is not just a name- it really IS a celery flavored soda.
Now, before you run screaming into the night, let me give you some background. First, the taste. Many people, when thinking of the flavor of celery, imagine old celery which has a very pronounced flavor, its stalks dark and heavy. There's a certain muskiness to them. This is not the flavor of celery soda. In fact, this recipe calls for celery seeds. Not salt, seeds.
In fact, celery seeds come from a particular variety of celery which is cultivated for the beautiful flavor and aroma of its seeds, while the stalk and roots (celery and celeriac, respectivly) are pretty much ignored. In terms of smell, it is rich, a little spicy, very aromatic. The taste when home made can most closely be approximated by ginger ale, with a little more aromatics and almost a hint of something like licorice. Real licorice, not the red stuff.
That said, before getting any further, a serious health warning. No, not allergies- if you're allergic to celery, I presume you're smart enough to avoid this. No, what I mean is that there are two kinds of celery seeds. There are celery seeds for eating and celery seeds for growing. DO NOT MIX THESE UP. Celery seeds for eating, as I mentioned before, are specifically cultivated from a different plant. Celery seeds for growing grow the other type of plant. Celery seeds for growing also tend to have other things mixed in with the seeds like tiny twigs and such. Most importantly, they are often sprayed with an anti-fungal compound which is toxic. So don't go to your local hardware store to buy these. Buy them from spice selections. They're good and they're cheap. If you're lazy like me, I bought three 1 pound bags from Amazon for $13. Yea, it's overkill, but it's really cheap stuff and lasts a really long time. The company I got mine from is really good, and worth taking a look: http://www.frontiercoop.com/products.php?ct=spicesaz&cn=Celery+Seed
When I've lived outside of New York, I miss it so much. I know how much it drives my poor mother and sister crazy that they can't get it. Celery soda has a pleasantly light sweetness combines with an aromatic astringency that cuts through fat and grease. As such, you can always tell the real Jews at places like Katz's and Carnegie because we're the ones with the celery soda to go with our pastrami (not corned beef) sandwiches. Also: hot pastrami is not hot because you stuck a refridgerated hunk on a meat slicer then microwaved it- it's hot because it's kept hot after the smoking and hand sliced. Damn, I could go for some pastrami....mmmm. Anyway, it really cuts through it nicely.
So, this recipe is dedicated to my benighted family members who can't get it.
Okay! Do yourself a favor and get a coffee mill/spice grinder. I have a mortar and pestle, but with the tiny seeds it would be a nightmare dealing with them in the mortar.
In a small saucepan, combine one cup of sugar with a half cup of water. Heat over a high heat until the sugar is mostly dissolved, then turn heat down to medium. While it is heating, grind 1 and a half heaping tablespoons celery seed. You don't need to powderize it, so a few seconds should more than do the trick.
Once all the sugar has dissolved and the sauce pan is clear and colorless, remove from heat and add the ground celery seed. Give it a good stir, then set aside, covered, for one hour. After an hour has passed, filter through a fine mesh. Don't use a coffee filter. The simple syrup will be too thick to filter properly, and it's possible that it will pick up a flavor along the way, while a mesh won't. If you're like me, the only fine metal mesh you have around is a tiny little egg-sized powdered sugar sifter, bent 3 ways from sunday. God, it's like making coffee at my grandfather's all over again. Alternately, you can use that french press sitting around that you never use.
Anyway, filter into a small mason jar (or something sealable) and stick it in the refrigerator to chill. You can use it immediately too, of course. You now have your celery syrup. Add a tablespoon to a glass, then add seltzer to taste. I find letting the syrup sit overnight is best before use.
This recipe is scalable, so feel free to double or triple it as you like. The syrup will keep in your fridge for practically forever, so you can easily make a small batch and just whip it out to make yourself a glass whenever you like. I'd be really curious to try making some cocktails with it actually. Asti- I think I have our next group activity planned!
Tuesday, December 18, 2012
In media res
I've been making these cookies for years and have lots of pictures to prove it - but it occurred to me that I've never posted the recipe on the family cooking blog.
So, here it is, my recipe for Colonial Williamsburg Soft Gingerbread. This is the stuff you buy at the bakeshop in Colonial Williamsburg. They now sell them individuall shrink-wrapped, but the cookies are the same as you remember - spicy, fragrant, not too sweet, and, most importantly: soft.
These are not the crispy gingersnaps you'll find in Scandinavia. This is gingerbread for Americans. It's thick, it's serious, it means business. You can have one of these things for breakfast. And it doesn't have to just come in circles. And it doesn't just have to be plain.
I've made this recipe every Christmas since I can remember, and I've made it so many times that I've refined it over the years from the original that I found in Mom's old "Recipes of Colonial Williamsburg" cookbook. This is how I do it:
Gingerbread
Ingredients:
1 cup sugar
2 teaspoons ginger
1 teaspoon nutmeg
1 teaspoon cinnamon
1 1/2 teaspoons baking soda
1/2 teaspoon salt
1 cup melted margarine
1/2 cup evaporated milk
1 cup unsulfered molasses
3/4 teaspoon vanilla extract
4 cups stone-ground or unbleached flour, unsifted, PLUS AS MUCH MORE AS YOU NEED TO MAKE IT STIFF. It will be much closer to 6 cups than 4 by the time you're done - don't worry about it!
Instructions: Combine the sugar, ginger, nutmeg, cinnamon, salt, and baking soda. Mix well. Add the melted margarine, evaporated milk and molasses. Add the extracts. Mix well. Add the flour 1 cup at a time, stirring constantly. The dough should be stiff enough to handle without sticking to fingers. Knead the dough for a smoother texture. Add additional flour if necessary to prevent sticking.
When the dough is smooth, roll it out ¼ to 1/2 inch thick (I like them THICK - they come out even softer!) on a floured surface and cut it into cookies. Bake on floured or greased cookie sheets - or, best yet, parchment paper! - in a preheated 375° F oven for 10 to 12 minutes. WATCH CAREFULLY. Depending on the oven you use, it can be as little as 8 minutes. They should NOT get too dark. The gingerbread cookies are done when they spring back when touched.
When cool, I like to ice them with vanilla frosting, which you can make yourself, but I just get it out of a can, mixing with food coloring to give it nice, festive, holiday colors. Green and red sugar also adds to the effect.
These freeze well.
Sunday, December 2, 2012
Wiener Schnitzel
I found myself staring at a pound of veal cutlets from the butcher. I hadn't opened the package, but I have yet to find something from my butcher that isn't gorgeous. But what to make with it? If I had more I could have done this or that or the other. But a pound for two people limits what you can do. Then I thought- well, I haven't had Wiener schnitzel in a few years. Seemed like a good idea. I unwrapped the package to find that the butcher had actually sliced the veal into 6-7mm thick large slices. It seemed that he also thought that schnitzel would be appropriate.
You'll need:
1 pound veal
2 big eggs
flour
breadcrumbs
2 sticks butter.
If you aren't lucky like me to have thin veal, you'll need to butterfly the meat and pound it flat with a mallet. You're going for really thin- 1/4th-1/3rd of an inch for my fellow Americans.
Dredge the veal in flour. Whip the eggs. Coat the veal in the eggs. Gently dredge the veal in the breadcrumbs- don't press the breadcrumbs into the meat (it moistens them and prevents them from getting crispy).
Melt a stick of butter in a saute pan. You should have enough veal to split into four batches. Put batch one into the pan for 4-5 minutes, then flip for another 4-5 minutes. Remove to a paper-towel covered plate. Repeat for second batch. By this point, the butter in the pan will be getting a bit icky. Pour it into the sink. Melt second stick of butter and repeat process.
Serve with freshly squeezed lemon juice.
Some notes: traditionally you cook the schnitzel in clarified butter, but I can't be bothered. Feel free to use more butter- if possible, you want to use enough that the meat is pretty much floating in the butter.
I found myself without breadcrumbs, but that veal had to be made. Searching the cabinets frantically, I found that we had a large can of crispbread from my sister's recent visit. I dropped most of it into my mortar and bashed it until it became breadcrumbs. Very flavorful! I have to recommend playing around with different kinds of bread, it really adds to the recipe.
Thanksgiving in Namche -or- Cooking with Altitude
On Wednesday the 21st I was having lunch with the Girls atThe Nest (I recommend the chicken sizzler) when it dawned on me that Thanksgiving was the next day. So I rather glibly said "Oh! We need to do Thanksgiving Dinner tomorrow".
Note for those who do not go trekking/mountaineering - Namche Bazar is at 3450m high in the Himlaya in Nepal.
Next thing you know, advertising was up and Sushila and I were scratching our heads trying to figure out what we could make.

My initial thought had been that we would buy a bird and have it slaughtered but those birds are really too rangy and are better for the pot than the pan. So instead we bought 2 frozen chickens. The problem then was how to defrost them when the ambient temperature is below freezing. In the end, we sat them in a sun well for a few hours.

And then poured boiling water over them and turned them every so often for an hour or so.

Once they were mostly defrosted, the next challenge was to butcher the beasts. I asked for butchers shears but was handed a huge cleaver and a ghurka knife. So rather than be a danger to myself and others I handed the birds and knives to the kitchen girl.

She then proceeded to pull out a small block of wood which she placed on the floor then she perched the carcass on the wood and I pointed out to her where to cut. I swear to you we washed the chicken pieces very well after this procedure. Then dried them well. I sliced up some limes on the baking tray then placed the chicken pieces on top, rubbing in salt, pepper and chilli powder.

Then popped into the oven at 240C for 1:15 minutes. This had to be done in 2 batches as we had so much chicken and such a small oven. Plus as soon as anything is cooked it starts to freeze so the idea was to precook everything and then heat it up again just before serving.
Other dishes prepared included sauteed chinese cabbage.


Of course it didn't help that by the time the potatoes were cooked and peeled they were freezing cold again. Anyway, while I had the girl mashing away I added 2 cans of canned cream, then melted and added a packet of something halfway between butter and margarine. Then we switched places with me mashing/whipping while she made powdered milk which I then whipped in. I'll be honest - it tasted a bit odd but I knew I would be deglazing the chicken pan to make a proper gravy and that will hide a myriad of sins.
We also cooked some of the local sweet potatoes and I made up a batch of honeyed carrots. Sushila made a big salad with lettuces, tomatoes, and radishes from her greenhouse that she served with fresh garlic croutons and 2 apple pies were baked.
All that was left was to set the tables and call in the guests.


I, of course, made my usual little speech about the true meaning of Thanksgiving and everyone tucked in. It was all well cooked with a crisp and yummy skin on the chicken, noone got ill, and we proved that it could be done - Thanksgiving Dinner at Altitude with Local ingredients.

The big lesson, I think, is that when cooking at altitude everything will take longer and need a higher temperature to cook.
I'd also like to say a big, grateful thank you to Sushila for allowing me to take over her kitchen and for putting up with my madness. ;-)
Final note: I am also cross-posting this to my trekking blog at ABC2EBC
Subscribe to:
Posts (Atom)