I've been making these cookies for years and have lots of pictures to prove it - but it occurred to me that I've never posted the recipe on the family cooking blog.
So, here it is, my recipe for Colonial Williamsburg Soft Gingerbread. This is the stuff you buy at the bakeshop in Colonial Williamsburg. They now sell them individuall shrink-wrapped, but the cookies are the same as you remember - spicy, fragrant, not too sweet, and, most importantly: soft.
These are not the crispy gingersnaps you'll find in Scandinavia. This is gingerbread for Americans. It's thick, it's serious, it means business. You can have one of these things for breakfast. And it doesn't have to just come in circles. And it doesn't just have to be plain.
I've made this recipe every Christmas since I can remember, and I've made it so many times that I've refined it over the years from the original that I found in Mom's old "Recipes of Colonial Williamsburg" cookbook. This is how I do it:
Gingerbread
Ingredients:
1 cup sugar
2 teaspoons ginger
1 teaspoon nutmeg
1 teaspoon cinnamon
1 1/2 teaspoons baking soda
1/2 teaspoon salt
1 cup melted margarine
1/2 cup evaporated milk
1 cup unsulfered molasses
3/4 teaspoon vanilla extract
4 cups stone-ground or unbleached flour, unsifted, PLUS AS MUCH MORE AS YOU NEED TO MAKE IT STIFF. It will be much closer to 6 cups than 4 by the time you're done - don't worry about it!
Instructions: Combine the sugar, ginger, nutmeg, cinnamon, salt, and baking soda. Mix well. Add the melted margarine, evaporated milk and molasses. Add the extracts. Mix well. Add the flour 1 cup at a time, stirring constantly. The dough should be stiff enough to handle without sticking to fingers. Knead the dough for a smoother texture. Add additional flour if necessary to prevent sticking.
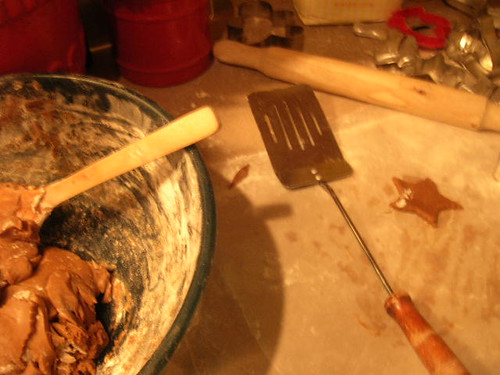
When the dough is smooth, roll it out ¼ to 1/2 inch thick (I like them THICK - they come out even softer!) on a floured surface and cut it into cookies. Bake on floured or greased cookie sheets - or, best yet, parchment paper! - in a preheated 375° F oven for 10 to 12 minutes. WATCH CAREFULLY. Depending on the oven you use, it can be as little as 8 minutes. They should NOT get too dark. The gingerbread cookies are done when they spring back when touched.
When cool, I like to ice them with vanilla frosting, which you can make yourself, but I just get it out of a can, mixing with food coloring to give it nice, festive, holiday colors. Green and red sugar also adds to the effect.
These freeze well.
Tuesday, December 18, 2012
In media res
Sunday, December 2, 2012
Wiener Schnitzel
I found myself staring at a pound of veal cutlets from the butcher. I hadn't opened the package, but I have yet to find something from my butcher that isn't gorgeous. But what to make with it? If I had more I could have done this or that or the other. But a pound for two people limits what you can do. Then I thought- well, I haven't had Wiener schnitzel in a few years. Seemed like a good idea. I unwrapped the package to find that the butcher had actually sliced the veal into 6-7mm thick large slices. It seemed that he also thought that schnitzel would be appropriate.
You'll need:
1 pound veal
2 big eggs
flour
breadcrumbs
2 sticks butter.
If you aren't lucky like me to have thin veal, you'll need to butterfly the meat and pound it flat with a mallet. You're going for really thin- 1/4th-1/3rd of an inch for my fellow Americans.
Dredge the veal in flour. Whip the eggs. Coat the veal in the eggs. Gently dredge the veal in the breadcrumbs- don't press the breadcrumbs into the meat (it moistens them and prevents them from getting crispy).
Melt a stick of butter in a saute pan. You should have enough veal to split into four batches. Put batch one into the pan for 4-5 minutes, then flip for another 4-5 minutes. Remove to a paper-towel covered plate. Repeat for second batch. By this point, the butter in the pan will be getting a bit icky. Pour it into the sink. Melt second stick of butter and repeat process.
Serve with freshly squeezed lemon juice.
Some notes: traditionally you cook the schnitzel in clarified butter, but I can't be bothered. Feel free to use more butter- if possible, you want to use enough that the meat is pretty much floating in the butter.
I found myself without breadcrumbs, but that veal had to be made. Searching the cabinets frantically, I found that we had a large can of crispbread from my sister's recent visit. I dropped most of it into my mortar and bashed it until it became breadcrumbs. Very flavorful! I have to recommend playing around with different kinds of bread, it really adds to the recipe.
Thanksgiving in Namche -or- Cooking with Altitude
On Wednesday the 21st I was having lunch with the Girls atThe Nest (I recommend the chicken sizzler) when it dawned on me that Thanksgiving was the next day. So I rather glibly said "Oh! We need to do Thanksgiving Dinner tomorrow".
Note for those who do not go trekking/mountaineering - Namche Bazar is at 3450m high in the Himlaya in Nepal.
Next thing you know, advertising was up and Sushila and I were scratching our heads trying to figure out what we could make.

My initial thought had been that we would buy a bird and have it slaughtered but those birds are really too rangy and are better for the pot than the pan. So instead we bought 2 frozen chickens. The problem then was how to defrost them when the ambient temperature is below freezing. In the end, we sat them in a sun well for a few hours.

And then poured boiling water over them and turned them every so often for an hour or so.

Once they were mostly defrosted, the next challenge was to butcher the beasts. I asked for butchers shears but was handed a huge cleaver and a ghurka knife. So rather than be a danger to myself and others I handed the birds and knives to the kitchen girl.

She then proceeded to pull out a small block of wood which she placed on the floor then she perched the carcass on the wood and I pointed out to her where to cut. I swear to you we washed the chicken pieces very well after this procedure. Then dried them well. I sliced up some limes on the baking tray then placed the chicken pieces on top, rubbing in salt, pepper and chilli powder.

Then popped into the oven at 240C for 1:15 minutes. This had to be done in 2 batches as we had so much chicken and such a small oven. Plus as soon as anything is cooked it starts to freeze so the idea was to precook everything and then heat it up again just before serving.
Other dishes prepared included sauteed chinese cabbage.


Of course it didn't help that by the time the potatoes were cooked and peeled they were freezing cold again. Anyway, while I had the girl mashing away I added 2 cans of canned cream, then melted and added a packet of something halfway between butter and margarine. Then we switched places with me mashing/whipping while she made powdered milk which I then whipped in. I'll be honest - it tasted a bit odd but I knew I would be deglazing the chicken pan to make a proper gravy and that will hide a myriad of sins.
We also cooked some of the local sweet potatoes and I made up a batch of honeyed carrots. Sushila made a big salad with lettuces, tomatoes, and radishes from her greenhouse that she served with fresh garlic croutons and 2 apple pies were baked.
All that was left was to set the tables and call in the guests.


I, of course, made my usual little speech about the true meaning of Thanksgiving and everyone tucked in. It was all well cooked with a crisp and yummy skin on the chicken, noone got ill, and we proved that it could be done - Thanksgiving Dinner at Altitude with Local ingredients.

The big lesson, I think, is that when cooking at altitude everything will take longer and need a higher temperature to cook.
I'd also like to say a big, grateful thank you to Sushila for allowing me to take over her kitchen and for putting up with my madness. ;-)
Final note: I am also cross-posting this to my trekking blog at ABC2EBC
Wednesday, November 21, 2012
Thanksgiving Dinner
Thanks to insanity from Hurricane Sandy, things in downtown Manhattan have been pretty insane. Among other things, my local Pathmark is now going out of business- but even before that, they were unable to get any fresh meat in for weeks. My local C-Town, I wouldn't eat their meat if you paid me. All of this means that until a few days ago, I wasn't sure I was going to be able to get a turkey for Thanksgiving.
Then a friend of mine with a car was able to take me to a Costco in Brooklyn. I looked for turkeys, but all I found were Butterballs (ewwwww) and some ludicrously expensive tiny turkeys. I also found a Thanksgiving Inna Box. It was a pre-cooked turkey, stuffing, potatoes, beans, etc. The entire thing could be ready in 90 minutes. I met a couple who were marveling over it and debating whether or not to buy it. Being the pushy New Yorker that I am, I told them not to.
"But look at the time you save!"
"Yes," I said "but Thanksgiving is the one day a year when you TAKE the time to make your dinner as great as you can. You do it so that you can be really thankful for being able to do things like this."
Look, I'll be fair. I know people that this pre-cooked turkey dinner would have been a godsend. Some people just aren't good cooks, can't be bothered, whatever. And for them, god bless. But this couple was standing there debating and it was clear they they were perfectly capable and willing to make their traditional dinner, they were just wrestling with temptation.
I was eventually able to get a real turkey, thankfully. That said, my Thanksgiving dinner is usually a fairly big draw for people. I thought it might be nice to talk a little bit about what I make and how I make it. The menu slowly changes over the years- adding an item here, removing an item there.
Turkey: Seemingly obvious for some people, strange to others. I've had vegetarian thanksgiving which was too proud to stoop to tofurkey, but it wasn't my cup of tea. Many dislike turkey because the meat is so dry or bland and boring. I've only ever had one turkey go dry on me, and it was an Empire Kosher turkey. Whether it was dry because it was kosher, or something else, I don't know. I baste my turkeys pretty damn frequently and the meat always comes out moist and flavorful. Doing this also ensures a tasty, crispy skin, for those of you who like that. Don't buy Butterball. Butterball shortcuts the basting process by injecting oil into the meat. Ew. People, basting takes two damn seconds. It isn't difficult or painful. It's Thanksgiving- put a modicum of effort in.
If your turkey is still partially frozen, it's okay. Just rinse the inside with some hot water before stuffing and stick it in the oven anyway. It'll take a little longer to cook, but it's okay.
Stuffing: It's called stuffing because you stuff it into the damn bird. The only time you should make a separate pan is if you have a hell of a lot of people coming to dinner. If that is the case, it's a good idea to buy a larger bird- larger cavity, after all. Part of the flavor of stuffing (as well as moisture) comes from the juices it absorbs from within the turkey as the turkey cooks. When you make that stovetop stuff, the flavor it gets comes from bouillon (mainly salt) as opposed to actual juices. Do yourself a favor. Either buy some real bread and let it sit out to get stale, or buy some Pepperidge Farms stuffing. Don't use pre-sliced bread. That's nice for sandwiches, but the water content is really high and it takes forever to get stale, because of all the stabilizers. If you try to use it and you don't dry it, you stuffing will end up being a gluey mess.
A question of texture. I know some people who take the raw stuffing, stick it into a blender until smooth, load it up into a baster, stick the baster under the skin of the turkey, and stuff the stuffing between the skin and the meat. I prefer not to have a stuffing paste. I actually mix my stuffing with my bare hands. It allows me to assess the stuffing both by look and by feel- making sure that everything is evenly coated and mixed, while delicate enough to prevent pasting. I'm not saying this is for everybody. It can often be painful, after I've added boiling water and going "Argh! Ow! Auuugh!" and my wife screams at me "Andrew, why don't you just use a fork?!" But it is how I like to do it.
Now, I like a savory stuffing. I know others like a sweet one, but I don't. I make a chestnut stuffing. That means that in addition to the bread, onions, celery and spices, I also add chestnuts. I like them in medium chunks rather than powder or in whole. Whole prevents the flavor from permeating through the stuffing. Medium lets you remember it's still there.
Pearl Onions: Traditionally, these are made in a very thin, slightly sweet white sauce. I haven't done that in years, but I may end up doing that this year. What I've done in years past was to make a heavy cream sauce, then melt good brie into it, making a brie sauce. It tastes divine, but it can overpower the onions and some people just ignore the onions to pour the sauce over the potatos, the meat, etc. That's a shame, because I do cook the pearl onions until just tender to the teeth.
Potatoes: By potatoes, I mean mashed potatoes. Simple potatos, butter, salt, pepper, a little bit of milk. I don't use powdered. I also don't do sweet potatoes.
Now, I've had a number of complaints over the years about the lack of sweet potato, so let me explain. We used to make them when I was growing up. And it wasn't that they were bad, it's just that everything else was so damn good that they never ended up being eaten. So one day we just said to hell with it and stopped making them, never looking back. Now when people explain that they'll eat every sweet potato I make, I look at them dubiously, then ignore them and don't make the things anyway. If you like them, good for you. But I *know* that it will jut be a waste of money and effort.
Brussels sprouts: Before you start complaining that you don't like brussels sprouts, shut up. First, the sprouts aren't frozen, but fresh. Frozen sprouts have a mushy interior. Second, mushy is not a texture sprouts should have. If you cook a sprout until it is mushy, you have overcooked it. Third, that bitter taste? That's also because you cooked it too long. Properly cooked sprouts have a very pleasant, slightly astringent green taste to them.
And I cook 'em in bacon (or when I've got dough, panchetta). Plus chestnuts. And onions. You could cook a hat in that combination, and it would be delicious.
Pomegranite sorbet: I've now made this both with fresh pomegranite juice from pomegranits I squeezed by hand, and once with pure unflavored Pom. I couldn't tell the difference, to be honest. A little bit of sugar, a little lemon juice, an astringent palate cleanser and a nice, light way to end the meal.
This year, I'm also planning to make some creme brulee with thick, coarse sugar on top. It allows a fatty, sweet dessert, but still very light.
Why not pumpkin pie? I used to make it. And, again, I made a very nice, very tasty pumpkin pie. But usually by the end of the meal, the last thing anyone wanted with a big piece of pie. So it would go uneaten. So I said, to hell with it. Nobody ever turns down creme brulee.
Hm. Maybe I'll make a pumpkin creme brulee, now that I think about it. At least it'll shut people up.
Sunday, October 7, 2012
Stuffed Porkchops
Stuffing pork-chops is a great way to prepare them as the stuffing helps to retain moisture.Sealing them with breadcrumbs also helps.
2 x 1.5 inch thick Country Style pork chops with pocket cut into them
Large cooking Apple
Ripe Fig(s)
1/2 onion
Lemon Juice
1 vegetable bullion pot (try not to use the cubes as they are just salt and crap)
seasoned breadcrumbs
1 egg
1/4 cup milk
flour
butter
olive oil
To get this cut of meat you will almost undoubtedly have to visit a proper butcher. Whereas regular pork chops will have a long or T bone, these are cut further along and only have a small piece of bone. The meat itself will also be darker and more tender (at least in my opinion). I have them cut 1.5 inches thick so this is a substantial piece of meat and could easily feed 2 people but I like to cook generously and love my leftovers so I had 2 pieces cut, 1 per person, and a deep pocket cut in the chop for the stuffing.
For the stuffing I peeled and finely chopped 1/2 of a very large cooking apple which I then set aside in a bowl and sprinkled with lemon juice to keep it from turning brown. I then spooned out and chopped up the insides of a very rip fig and added this to the bowl of apple pieces. Finally I finely diced half a regular onion. I sautéed the onion in butter until translucent then added the vegetable bullion pot and let that melt into the onion. I add ~1/4 cup of seasoned breadcrumbs and allow that to soak up the butter then add some boiling water by eye until the breadcrumbs loosen up again, stirring al the time. Finally I add in the apple/fig mixture and give it a good stir to evenly distribute.
You could stuff with other mixtures like apple/raisin/walnut. I work with whatever looks good at the greengrocer.
I then spoon the stuffing into the pocket. Just as when stuffing a bird, leave room for it to expand. I then take a few toothpicks and skewer the pocket closed.
Next I double dredge the pork chops. This means that I dredge the dry pork chops in flour, coating them well. I then immerse the floury chops in a 50/50 mix of egg and milk, then do a final coating in seasoned breadcrumbs.
At this point I have the oven pre-heating to 350/180 and a large pan on the stove with 2 tablespoons of butter and an equal amount of olive oil at medium heat.Test that the pan is heated by dripping some water in the pan. It should sizzle. Or drop some flour in and it should brown but not burn. So, when the temperature is right, add the pork chops to the pan and then don't touch them for 5 minutes. You want the breadcrumbns to form a hard golden brown crust, shading toward brown rather than gold. Then turn them over and repeat. This will seal in the moisture.
.JPG)
Transfer the chops to a deep baking tray (I use a metal one as they cook more quickly and efficiently than a ceramic dish) and cover/seal with foil. Pop this in the oven for 30 minutes.
While the chops are cooking I use the leftover apple to make some applesauce and prepare my vegetables. In this instance I made steamed cabbage and mashed potatoes but during the half hour baking time I just prepped the veg rather than cooking.
After 30 minutes I removed the foil and returned the dish to the oven to continue cooking for another 10-15 minutes. In the meantime I cooked and mashed my potatoes and steamed the cabbage. Check the chops after 10 minutes. If they are cooked then remove from the oven and allow to rest on the dinner plates, otherwise turn off the heat and allow them to rest in the oven.
.JPG)
Monday, October 1, 2012
Creamy Crockpot Mushroom Risotto
I was raving to Andrew the other day about my favorite crockpot recipe: mushroom risotto. It's a huge favorite in my household, and Sean and I enjoy it about once a month. (We'd have it even more often, were it not so rich and caloric!) He said, "Why don't you post it on the family cooking blog?"
Duhhhhhh.
This is adapted from a recipe I found on a site called A Year of Slow Cooking.
I've never made "real" (stovetop) risotto, because it seems so labor-intensive - all that stirring. Not so with this risotto. The crockpot does all the work for you. Just toss everything in, cook on high for about 2 and a half hours, stir in the cheese, and try not to eat it all in one sitting.
Ingredients:
--1 1/4 cup uncooked Arborio rice
--1/4 cup olive oil
--4 cups chicken or vegetable broth
--1 tsp onion powder
--5 cloves chopped garlic
--1 tsp kosher salt
--1/4 t black pepper
--1 package sliced, pre-washed mushrooms (cremini or baby bella, nothing too rubbery)*
--2/3 cup shredded parmesan cheese (to add at the very end)
Toss the rice and olive oil together in the crockpot. Mix in everything else except the cheese (mushrooms last).
Set crockpot on high for about 2 and a half hours. (Cooking time may vary but I find 2.5 is just about right.)
Come back when time's up, take the lid off your crockpot and stir in the cheese. Leave it uncovered on the "warm" setting for 15 minutes, stirring occasionally, to evaporate any excess liquid.
Enjoy. Fight over who gets to lick the spoon.
(You can make this recipe without mushrooms, but they really add a wonderful earthiness to the dish that I really love. Also, you can substitute 1/2 cup of the broth for white wine; our house is alcohol-free so I just make it with all broth. Regarding the type of mushroom, you can experiment, but you'll want to stay away from tougher mushrooms like chanterelles.)
Sunday, September 30, 2012
Mushroom Barley Stew
This was a wonderful dish that my mother used to occasionally make when I was growing up. Of course, back then it was mainly barley, a little bit of mushroom, and the rare surprise bit of beef. The day my sister came to visit, the temperature plummeted twenty degrees, and has pretty much stayed there for the last month. For whatever reason, I was remembering this stew again.
As usual, I told my wife I wanted to make something that she'd never had before. She complained, saying that she hated it because she didn't like one of the ingredients (in this case, the barley). I told her to wait and see. I cooked it, she tried it, she fell in love. Try it yourself, you might be surprised.
Annoyingly, while this was a classical inexpensive yet hearty meal, that's not so much the case anymore. For example: the beef. The phrase "ask your butcher..." has a meaning. And it means to avoid talking to people that work in your local supermarket. I'm sure they're nice people, but they are to butchers what my 2 year old niece is to Picasso. They're not butchers, they are meat cutters.
Since this is a stew, I wanted to buy a cheap cut of meat. I went to talk to one of the meat cutters through the little window. I explained that I wanted some stewing meat, did he have a cheap cut available that he could recommend. Sure, he says, and comes right out to go through the meats with me. Well, I was pleased, until he picked up a beautifully marbled piece of ribeye and offered it to me.
"No, I'm sorry, this is for a stew. I need a cheap cut."
"It's on sale though"
"Yes but it's $7.50 a pound. This is really too expensive for stew. It's also the wrong cut; if I were to buy this I would cook it like a steak."
He was confused and went back and came back with something else preposterously expensive, though less so than the ribeye. We went through the same deal again. Finally he offers me the London Broil which he insists is the absolute cheapest cut of meat that they have available. At $3.99 a pound. I wanted to weep. I bought a pair of london broil steaks anyway. I will say that they ended up being delicious in the dish, but my heart bled thinking of how much they cost. Remember, Pathmark is not where you go to get advice from your butcher.
This goes for fishmongers too. A few years ago, I was making bouillabaisse and was chatting with the fishmonger about what fishes he had that he could recommend. When I was growing up, you asked the butcher and the fishmonger and you took their opinion seriously- they often had a better idea than you did how to treat their product. My fishmonger proceeds to tell me that I should throw a porkchop into the stew to make it taste great. I corrected him, explaining that it's a fish stew, not really something for a porkchop. Then he tells me to throw in some tofu, to make it really nice. I never asked him about anything again, after that.
Mushrooms were on sale, so I bought one pound of white and one pound of baby bella. You can feel free as you like to try other varieties of mushroom (and as I live in chinatown, home of fungus, I am tempted to do exactly that) but I bought what was cheap and on sale.
You will need:
1. 6 cans of chicken stock. I used College Inn, 2 cans each of the reduced sodium fat free (I wanted minimum salt), 2 cans regular, 1 can chicken stock vegetable, 1 can chicken stock with roasted garlic.
2. 2 pounds mushrooms (feel free to use more!)
3. a couple of pounds of beef (the beef is meant more to flavor the stew than be a major component. This is a highly savory dish [fuck you, Umami!] with strong mushroom taste. The meat should not overwhelm the mushroom)
4. 2 spanish onions.
5. celery
6. At least a half stick of butter.
7. 4-5 cloves garlic.
8. 5 cups water.
9. 2 cups dry barley (they look like stunted grey rice grains, if you've never seen them before). Sometimes referred to as pearl barley.
Dump the chicken stock and water into a large pot and heat on high. Once it reaches a boil, bring the heat down so that it just simmers. Add barley.
If you have an assistant, you can do this step at the same time as the next step. Otherwise do it now. Rinse off your mushrooms, then slice them up (keeping both cap and stalk). You want them around 5-7 mm thick (a little bit less than 1/4th of an inch). It's two pounds, so it'll take you a few minutes. Once you're done, gently store them in a large mixing bowl until later.
Medium/rough chop the onions. Don't worry about pretty- they'll pretty much melt into the soup. In a frying pan on medium heat, melt a tablespoon of butter and coat the inside of the pan with the butter. Add the onions. Give them an occasional stir. Crush the garlic and add to the onions. Take a half down stalks of celery, trim the top and bottom and rinse. Chop the celery and add to the onions. Give this mixture an occasional stir until they've softened, say about 5 minutes or so. Dump the mixture into the simmering stock pot.
Melt another tablespoon of butter in the frying pan, and coat the entire bottom. Now here is a trick. Dump a single layer of mushrooms in the pan, then LEAVE THEM ALONE for 2 minutes. Julia Child described it as "Don't Crowd The Mushrooms" as memory serves. Effectivly, if you want them to get nicely browned, you must *not* stir them around a lot. Just leave them alone. After 2 minute, flip them over- you should see a somewhat golden color on the hot side. Now let them sit a further two minutes, allowing both sides a total of 2 minutes in the frying pan on medium heat, then dump the mushrooms into the soup pot. Repeat until all your mushrooms are in the soup pot- this will use up a fair amount of butter since you will add another tablespoon of butter after each batch. Once you're done, add a little bit of water to the frying pan and swirl it around to get any stray juices or anything left behind, then dump that water into the soup pot.
While the mushrooms cook, start cutting up your steak. I like to cut it into bite sized pieces roughly a half inch cubed. When you're done, dump the meat into the pot.
Once everything is in the pot, leave it simmering for 2 hours. Come back to taste. Now, at this point you can eat it, but you have some choices. I didn't bother to season mine- the salt from the chicken stock meant it didn't need any more, and it didn't really need any pepper. You may want to add your own. That said, by this point you'll probably be pretty hungry. I urge you to eat a bowl now if it will satisfy your hunger a bit. But turn off the heat and wait another half an hour. When you try the soup after a half hour of sitting, the character will have completely changed. What is a somewhat mushroomy soup, pleasant enough, will become completely unctuous You may not want to season it and take away from the woodsy, meaty savory taste from the mushrooms. All I'm saying is to wait that half hour, then see how you want to season it.
This isn't the cheapest meal, but it will feed several people for a couple of days, so I guess it works out to around a dollar a bowl. Enjoy!
Comment from Barb this is the sort of cheap meat you want for this recipe. The one pictured is called a Blade Steak. It's from the Shoulder (Chuck) section of the steer.

There are 2 cuts of this steak - the better one above and the cheaper one I've pasted below.

They are both fine for making soup and stew and will give you deep beefy flavour.
Further comments from Andrew: In talking about this post, my mother made several excellent points which I overlooked. First, I would normally have added a couple of bay leaves to the pot, but it slipped my mind entirely. Second, the chicken stock is the quick and easy option. The longer (and obviously superior) version is to take the meat and veggies and pop them in the pot the night before, making a stock. Leave in the fridge overnight to scoop any fat off the top. Next day, take the cooked meat and pop off any bones or fat or whatever, then re-add back to the soup.
My mother also recommends adding a few whole cloves.
This is absolutely what I would normally do, but for two reasons: 1. I went grocery shopping on the day I made the recipe, so I didn't have the stuff to make the night before. 2. It was tough enough convincing my wife to try it as it was, let alone telling her it would take a couple of days. If you're reading this and you've never had mushroom barley soup (of you've had the garbage most restaurants and such serve) and the idea of taking two days to make it seem a bit much, try the recipe as given. If you are familiar with the good stuff and want it even better, make your own stock.
Chicken stock is usually a decent shortcut. Do NOT try to take a shortcut and use canned beef stock. Something about the stuff is so awful- it's all salt and no flavor.
In these increasingly depressing economic times, I think that some of us are increasingly returning to our culinary roots. These roots are often steeped in poverty, with the idea of taking something cheap and making it delicious and filling. In a sense, I think this is great. We talk about America being the melting pot, but what it really often means is that we are moving away from our cultural heritages (the good points, anyway) and becoming more and more bland "American." I'm an American, and proud to be so. But part of the delight of being America is in rubbing elbows with so many different cultures and ideas and ways of life. And cuisines. Some cooks have tried to push us to eat more cheeks and jowls and tripe. I don't know how on board I am with that, but I appreciate the sentiment. If you are like me (and apparently half of America) and live below the poverty line, and you don't want to eat fast food anymore, dishes like this are the kind of thing you need to know about.
As usual, I told my wife I wanted to make something that she'd never had before. She complained, saying that she hated it because she didn't like one of the ingredients (in this case, the barley). I told her to wait and see. I cooked it, she tried it, she fell in love. Try it yourself, you might be surprised.
Annoyingly, while this was a classical inexpensive yet hearty meal, that's not so much the case anymore. For example: the beef. The phrase "ask your butcher..." has a meaning. And it means to avoid talking to people that work in your local supermarket. I'm sure they're nice people, but they are to butchers what my 2 year old niece is to Picasso. They're not butchers, they are meat cutters.
Since this is a stew, I wanted to buy a cheap cut of meat. I went to talk to one of the meat cutters through the little window. I explained that I wanted some stewing meat, did he have a cheap cut available that he could recommend. Sure, he says, and comes right out to go through the meats with me. Well, I was pleased, until he picked up a beautifully marbled piece of ribeye and offered it to me.
"No, I'm sorry, this is for a stew. I need a cheap cut."
"It's on sale though"
"Yes but it's $7.50 a pound. This is really too expensive for stew. It's also the wrong cut; if I were to buy this I would cook it like a steak."
He was confused and went back and came back with something else preposterously expensive, though less so than the ribeye. We went through the same deal again. Finally he offers me the London Broil which he insists is the absolute cheapest cut of meat that they have available. At $3.99 a pound. I wanted to weep. I bought a pair of london broil steaks anyway. I will say that they ended up being delicious in the dish, but my heart bled thinking of how much they cost. Remember, Pathmark is not where you go to get advice from your butcher.
This goes for fishmongers too. A few years ago, I was making bouillabaisse and was chatting with the fishmonger about what fishes he had that he could recommend. When I was growing up, you asked the butcher and the fishmonger and you took their opinion seriously- they often had a better idea than you did how to treat their product. My fishmonger proceeds to tell me that I should throw a porkchop into the stew to make it taste great. I corrected him, explaining that it's a fish stew, not really something for a porkchop. Then he tells me to throw in some tofu, to make it really nice. I never asked him about anything again, after that.
Mushrooms were on sale, so I bought one pound of white and one pound of baby bella. You can feel free as you like to try other varieties of mushroom (and as I live in chinatown, home of fungus, I am tempted to do exactly that) but I bought what was cheap and on sale.
You will need:
1. 6 cans of chicken stock. I used College Inn, 2 cans each of the reduced sodium fat free (I wanted minimum salt), 2 cans regular, 1 can chicken stock vegetable, 1 can chicken stock with roasted garlic.
2. 2 pounds mushrooms (feel free to use more!)
3. a couple of pounds of beef (the beef is meant more to flavor the stew than be a major component. This is a highly savory dish [fuck you, Umami!] with strong mushroom taste. The meat should not overwhelm the mushroom)
4. 2 spanish onions.
5. celery
6. At least a half stick of butter.
7. 4-5 cloves garlic.
8. 5 cups water.
9. 2 cups dry barley (they look like stunted grey rice grains, if you've never seen them before). Sometimes referred to as pearl barley.
Dump the chicken stock and water into a large pot and heat on high. Once it reaches a boil, bring the heat down so that it just simmers. Add barley.
If you have an assistant, you can do this step at the same time as the next step. Otherwise do it now. Rinse off your mushrooms, then slice them up (keeping both cap and stalk). You want them around 5-7 mm thick (a little bit less than 1/4th of an inch). It's two pounds, so it'll take you a few minutes. Once you're done, gently store them in a large mixing bowl until later.
Medium/rough chop the onions. Don't worry about pretty- they'll pretty much melt into the soup. In a frying pan on medium heat, melt a tablespoon of butter and coat the inside of the pan with the butter. Add the onions. Give them an occasional stir. Crush the garlic and add to the onions. Take a half down stalks of celery, trim the top and bottom and rinse. Chop the celery and add to the onions. Give this mixture an occasional stir until they've softened, say about 5 minutes or so. Dump the mixture into the simmering stock pot.
Melt another tablespoon of butter in the frying pan, and coat the entire bottom. Now here is a trick. Dump a single layer of mushrooms in the pan, then LEAVE THEM ALONE for 2 minutes. Julia Child described it as "Don't Crowd The Mushrooms" as memory serves. Effectivly, if you want them to get nicely browned, you must *not* stir them around a lot. Just leave them alone. After 2 minute, flip them over- you should see a somewhat golden color on the hot side. Now let them sit a further two minutes, allowing both sides a total of 2 minutes in the frying pan on medium heat, then dump the mushrooms into the soup pot. Repeat until all your mushrooms are in the soup pot- this will use up a fair amount of butter since you will add another tablespoon of butter after each batch. Once you're done, add a little bit of water to the frying pan and swirl it around to get any stray juices or anything left behind, then dump that water into the soup pot.
While the mushrooms cook, start cutting up your steak. I like to cut it into bite sized pieces roughly a half inch cubed. When you're done, dump the meat into the pot.
Once everything is in the pot, leave it simmering for 2 hours. Come back to taste. Now, at this point you can eat it, but you have some choices. I didn't bother to season mine- the salt from the chicken stock meant it didn't need any more, and it didn't really need any pepper. You may want to add your own. That said, by this point you'll probably be pretty hungry. I urge you to eat a bowl now if it will satisfy your hunger a bit. But turn off the heat and wait another half an hour. When you try the soup after a half hour of sitting, the character will have completely changed. What is a somewhat mushroomy soup, pleasant enough, will become completely unctuous You may not want to season it and take away from the woodsy, meaty savory taste from the mushrooms. All I'm saying is to wait that half hour, then see how you want to season it.
This isn't the cheapest meal, but it will feed several people for a couple of days, so I guess it works out to around a dollar a bowl. Enjoy!
Comment from Barb this is the sort of cheap meat you want for this recipe. The one pictured is called a Blade Steak. It's from the Shoulder (Chuck) section of the steer.
There are 2 cuts of this steak - the better one above and the cheaper one I've pasted below.
They are both fine for making soup and stew and will give you deep beefy flavour.
Further comments from Andrew: In talking about this post, my mother made several excellent points which I overlooked. First, I would normally have added a couple of bay leaves to the pot, but it slipped my mind entirely. Second, the chicken stock is the quick and easy option. The longer (and obviously superior) version is to take the meat and veggies and pop them in the pot the night before, making a stock. Leave in the fridge overnight to scoop any fat off the top. Next day, take the cooked meat and pop off any bones or fat or whatever, then re-add back to the soup.
My mother also recommends adding a few whole cloves.
This is absolutely what I would normally do, but for two reasons: 1. I went grocery shopping on the day I made the recipe, so I didn't have the stuff to make the night before. 2. It was tough enough convincing my wife to try it as it was, let alone telling her it would take a couple of days. If you're reading this and you've never had mushroom barley soup (of you've had the garbage most restaurants and such serve) and the idea of taking two days to make it seem a bit much, try the recipe as given. If you are familiar with the good stuff and want it even better, make your own stock.
Chicken stock is usually a decent shortcut. Do NOT try to take a shortcut and use canned beef stock. Something about the stuff is so awful- it's all salt and no flavor.
In these increasingly depressing economic times, I think that some of us are increasingly returning to our culinary roots. These roots are often steeped in poverty, with the idea of taking something cheap and making it delicious and filling. In a sense, I think this is great. We talk about America being the melting pot, but what it really often means is that we are moving away from our cultural heritages (the good points, anyway) and becoming more and more bland "American." I'm an American, and proud to be so. But part of the delight of being America is in rubbing elbows with so many different cultures and ideas and ways of life. And cuisines. Some cooks have tried to push us to eat more cheeks and jowls and tripe. I don't know how on board I am with that, but I appreciate the sentiment. If you are like me (and apparently half of America) and live below the poverty line, and you don't want to eat fast food anymore, dishes like this are the kind of thing you need to know about.
Wednesday, September 19, 2012
Meatloaf
I've had a rather flatteringly large number of requests for my meatloaf recipe, so here we go. I've tried playing around with various things and as usual, I boiled it down to these essentials. Feel free to play with things like adding different kinds of meats, etc. But I haven't seen it make a huge difference.
You'll need:
1 pound ground beef (I usually use 80:20 because it's $3/pound)
1 pound ground pork
~ 1 1/2 cup breadcrumbs
salt
pepper
honey
ketchup.
3 eggs
Preheat oven to 350 degrees.
In a bowl, combine beef, pork, eggs, breadcrumbs. If you have spiced breadcrumbs, carefully add salt (often it already has salt, and quite a lot, so be careful) and pepper. Mash it all together with your hands until smooth and homogeneous. In a small pot, combine a quarter cup each of honey and ketchup- I don't ever actually measure it out, I just pour it out and do it by eye. Heat the pot and stir the honey and ketchup until uniform, then remove from heat.
If you're like me, you have no idea what happened to your mother's meatloaf pan. Well, that's alright. Surprisingly, it is less useful than you might think. I usually use my pyrex casserole dish, but I've also used a flat cookie sheet as well. Use what you have. Take your large lump of meat and slap it together into a rough sphere. Plop it down gently into the baking dish. Now here's a neat trick. You'll want a rough sort-of loaf shape, the classical meatloaf shape. But what's the best part of the meatloaf? The outside, of course. Press the meatloaf into an oblong spheroid roughly an inch and a half to two inches high. For me, with my giant man hands, I put my thumb and forefinger stretched out as wide as I can and press the meat out like that, but feel free to just shape it as you like. Squashing it flatter like this results in several things: 1. it increases the surface area to volume ratio, which allows the meatloaf to cook more quickly and more evenly. 2. With increased surface area, you get much more of the yummy caramelized surface. 3. It decreases the thickness of the thickest point in the meatloaf, again allowing it to cook both more quickly and more evenly. All in all, it's a good idea. Feel free to make it longer, but keep it fairly low and wide.
Finally, pour the honey/ketchup on top and make sure to coat the entire top and sides. You should have just enough with maybe a little extra on top.
Stick into oven for an hour to an hour and a half- I always check with my meat thermometer after an hour and the temp usually reads 168-171 degrees, which is pretty perfect for meatloaf. Take out and allow to sit for ten minutes.
Serve with mashed potatoes and peas. This makes enough for four hungry people or two hungry people with leftovers for lunch the next day. I like to eat mine with ketchup.
Tuesday, September 4, 2012
Sloe Gin/Vodka
I am my father's daughter I guess because I have an interest in foraging and bushcraft. Plus I enjoy hiking. So I've now joined a foraging and bushcraft group which is great because it really adds something to my hiking excursions.
Anyhoo, I went out to the East Ham Nature Preserve in London last Saturday and loaded up on sloes and wild plums.
So I got my ass in gear and bottled up some sloe gin and sloe vodka today. I have to say I'm not the biggest fan of these but other people seem to appreciate it. Maybe I just need to let it sit long enough to really mellow. It just tends to taste like Robitussin to me.
Nonetheless! If you are interested in making this:
1 kilo sloes
700 gm sugar
3 lt gin/vodka
Take each freaking sloe and prick it several times with a pin. Put into an empty gin bottle filling it to 1/3. Add 175 gm sugar then fill to top with gin. Seal it and shake. Put in a dark and warm place to sit for at leats 3 months, turning/shaking each bottle 1x/week.
Should be sufficient to fill 4x1 lt bottle.
Sunday, August 12, 2012
Adventures in Canning
My father and I drove out to an orchard in PA yesterday that we used to like to visit. It's peach season right now, and I picked up a few pecks of white peaches and another variety whose name slips my mind at the moment. The white are a hair underripe but the other variety was dead perfect. I couldn't wait to get them home and try out some canning.
And here is where the problems began. Let this be a warning to you- you will screw up your first few batches in canning before you start to learn some of the tricks. Let me share some of mine with you.
1. Be wary of cookbooks. They love to make crap so easy, and they leave out all kinda of practical information. Ones which come with your various pressure canners and such may be poorly written, even if the canner itself is excellent quality.
I tried following a few recipes, including last night when I wanted nothing more than to crawl into bed and sleep. I whipped out my home scale and weighed out two kilos of parboiled-then-skinned-and-pitted peaches. I didn't have enough sugar, so I added only a little bit of water. That was pretty well it for the recipe. The result? Tasty but liquid.
2nd attempt.
My lovely wife ran out and bought more sugar. I prepped everything ahead of time, thought it would all me fine, figured out which pots I wanted for what, etc. One problem I had had last night was the pot that I used was too small, and kept slopping over with the peach mash. So I used a larger one today. I also tried a different recipe and finely diced 4 Ginger Gold apples that I had also bought (a variety which always bring the taste of home to me, because we used to grow this variety on our old farm). I added the recommended amount of sugar and set it to heat.
And it just wouldn't get hot enough. It was stuck at 100 degrees C. The gel point is 106 C. Well, let this be a lesson to you- you can sometimes be too smart for your own good. There was plenty of liquid, but it was all peach juice, no water. Clearly dilution wasn't a good idea. I remembered hearing stories of recipes which tell you to only add a limited amount of sugar, but you need to add a shitload more until it gels. So set about doing as much. From the initial 5 cups of sugar, I must have added another...you know, I didn't keep count. It may well have been another 8 cups. The temperature went up to 103 C. Still not high enough. I tried tasting it and almost gagged- so damn sweet. This was insane. I decided to hell with it and jarred it anyway- some people like the stuff sweet.
The first jar was liquidy. As I filled, however, the mash clarified and thickened. I realized then (of course) that the problem was that my batch had been much too large. Had I split it into two smaller batches, I could have used the smaller pot and everything would have been fine. Using the larger pot meant that the pot was radiating heat so quickly that the mash just could not get up to the required temperature. My stove, though gas, is somewhat weak in this regard. Normally it is fine, but for things like this it shows its limitations.
So now I have several gallons of peach jams/preserve/syrup/candy. More peaches to go, but I need a break. It is frustrating. It's not even about the money, it's about the waste. Hopefully batch number 3 will be better- that should be the white peaches now. Here's hoping!
Sunday, August 5, 2012
Quickie Chicken
When I was a little kid, I used to enjoy chicken skin. And then one day, I must have been 6 or 7, I sat there at the dinner table. I remember that old dinner table, big black formica top and curling iron legs below. I never realized until just now how odd it was that we had a round dinner table, rather than a rectangular one. I think that it made the dinners more comfortable, more intimate, while rectangular dinner tables feel much more formal. I miss that table very much. I miss my mother's kitchen, with walls of spices and copper bunt cake pans in the shapes of fish.
In any case, there I was, eating chicken. Maybe it was that the skin that night wasn't quite so crispy, or maybe it was just me. I looked down and it suddenly occurred to me. I was eating skin. Skin. Something about the very concept of it horrified and disgusted me. I put the skin down and walked away. Well, figuratively at least. I never ate chicken skin again.
And this wasn't as much of a sacrifice as many people think. God, I sound like a schmuck vegan, suddenly. But often when chicken was served, whether at a barbeque or a carnival or in school, the skin would be greasy and rubbery and very unpleasant. I used to get so annoyed with barbeque chicken in particular, because it seemed that the chicken was always burned, and any sauce or flavor was wiped on the skin so that when I removed it, I had purely unflavored chicken. It wasn't very good. And always that unpleasant rubbery skin which I would peel off and throw away.
Some of this taste has carried to me today. When I barbeque, I don't like large burned areas- I feel that the taste of charred carbon is unpleasant. It took me a long time to realize that when people referred to grill marks, they didn't mean the centimeter-thick black carbon deposits often found on grilled meat. When I barbeque my meat, among other things, I turn it frequently. This allows the sauce to have a chance to caramelize without burning, something I find to be very important.
Back to the chicken, a few months ago I started to make chicken in a new, very easy way. And what I discovered was that, after 20 years, I enjoyed eating chicken skin again. When I make it, at least. The trick is spicing it properly, and getting it crispy.
I usually take a few chicken legs at least (often pretty cheap at the supermarket) and place them in a pyrex casserole dish. Stuffing underneath is nice but optional. Sprinkle on top (and on the bottom if you like) liberal amounts of salt, pepper, and thyme. I used to use a lot more spices, but I eventually pared it down to these three because I truly didn't notice any real difference/improvement. This is dried thyme, I should say. Shove the chicken into an oven preheated to 350 degrees for one hour. Without opening the oven, turn the temperature up to 425-450 for 15-20 minutes (depends on your taste). What is happening is that the first hour was sufficient to cook the chicken, the last part is to crisp the skin up. Then simply remove from the oven and allow the chicken to sit for 10 minutes. The skin will be crispy and flavorful, the meat tender and juicy.
Not a complicated recipe by any means. But some days when I get home, I want something tasty and comforting, and I am too tired or lazy to do anything remotely elaborate. This is one of the dishes I make. Simply sprinkle salt, pepper and thyme onto some chicken and shove it in the oven. Sometimes simple is best.
Friday, April 6, 2012
Gefilte Fish Update
Whew! Ungh! Those fishmongers don't know a damn thing about filleting. It took me forEVER to remove all those bones.
So, let's see. I kept the tasty part of the fish in the refridgerator. Meanwhile, into a large pot was put the bones and head and tail from the fish, a large onion cut into quarters, a generous dash of black pepper, and about 3/4ths of a chinese carrot. The onion included the orange-brown outer skins, because it adds a nice color to the stock. Yea, I know, stupid. But it does make dealing with the onion easier too. A chinese carrot is the kind of huge carrots you find frequently here in chinatown- each carrot is roughly the size of 3-4 regular carrots.
I would have put all of this into a cheese cloth for easier removal later, but I couldn't find any in the stores. Naturally, after putting everything into the pot, I found some.
That simmered for 3 hours, with occasional scum skimming from the top. Once this was done, the stock was filtered by hand very carefully. Lovely smell, nice dark color. This was set aside for later, although 2-3 cups was separated from that as well. I'll get to this later.
The fish was inspected and bones ruthlessly eliminated. Now, a lot of people will tell you to chop the fish into little cubes. This is useful if you are hand chopping everything together later. I, however, am not. I have a meat grinder, and my meat grinder works best with meat when it is cut into long, fat strips. So I cut my fish into long fat strips. Don't judge me.
I also rough chopped a large onion (or peel this time) and added it to the fish strips. Both the fish and the onion went into the meat grinder together. Once the fish was ground, it was sprinkled with 2-3 dashes of kosher salt and roughly mixed by hand. This was just to make sure the salt was evenly distributed. I cracked 8 eggs and the whites went into the fish.
Separate the fish into two portions. Put the first portion into a food processor. Blend until smooth. Repeat with the other portion, then combine. Add a cup of matzoh meal.
What's that? I have a box of matzoh meal in my cupboard which expired in June, 2009. Hm, no. Off to the supermarket! It's closed for good friday. Well, damn. Hell with it, I have a box of Streitz's egg matzoh upstairs, fresh. Well, freshly bought a week ago. It's still perfectly good. I crumbled up two sheets roughly, then stuck them into my mortal and pestle and made my own damn matzoh meal, then added that to the fish and mixed it in by hand.
Remember those two-3 cups of stock you held in reserve? Take that and dump it into a small pot or pan and heat to simmering. Take some of the fish and mold it into a mini piece of gefilte fish. Drop this gently into the simmering stock. Simmer for ten minutes, flipping halfway in between. Eat it, and adjust the main batch for taste (this is known as batch testing ;) ). Don't forget the horseradish!
Once satisfied, cover the bowl with clingwrap and stick it into the refrigerator for at least an hour before cooking.
Quick note. I thought it tasted delicious, with a slight almost smoky underflavor from the type of fish. I enjoyed it immensely, however. My wife loathes gefilte fish, but I know she's only ever had in from a jar. Brave soul, she was willing to try my homemade stuff. To her surprise, she actually liked it. It is honestly and truly a completely different creature than the stuff from the jar.
Preparing for Passover
Whew, Passover is tonight and my Seder is tomorrow night. As I have today off from work, I did some necessary shopping this morning, with more to come later.
I decided this year to make my own gefilte fish. Here in Chinatown there are several fishmongers. Chinatown fishmongers still have a bad reputation because of what they used to be like. However, the combination of new York health inspectors doing their job, a clientele who suddenly cares about not being poisoned, and people realizing that you can partially tell the quality of a fishmonger just by the smell.
I made one foolish mistake. I assumed that they would have Whitefish. Looking back it would seem obvious- the chinese don't eat whitefish and neither do many other people.
I arrived at my preferred fishmonger early this morning, around 8:45 or so, just in time to see the fresh live fish being offloaded from the delivery truck, and fishmongers spreading and tamping down the ice for the day. No, they didn't have whitefish. No they didn't have cod. They probably had pike, but I don't like pike. Well, how about tilapia? The man pointed to the live tanks being refilled from the truck. Exxxxxllent. How much? $3.50 a pound? Sold. I got about twelve pounds of fish, had them filleted for me, kept the heads and bones and such for the stock. It ended up being about four and a half pounds of meat, which is just how much I wanted.
So, right now I have the stock pot boiling and I'm going to make some lovely, fresh stock.
Funniest part of it all? Seeing the fish dumped on the clean table and having the shit beaten out of them with a chair leg before being cut open. Maybe that sounds sick, but the fact that it was an honest to god chair leg is what cracks me up.
Wednesday, April 4, 2012
Chicken and Spaghetti with lemon-wasabi "aioli" (mayo)
My wife has learned that when she texts me at night and asks what is for dinner, my response will often be a simple one word reply: stuff. Stuff generally means that I have no idea, I'm making it up as I go along, and I'm probably making it right now and can't respond. On occasion I am done cooking but too exhausted to explain in detail.
So, dinner last night was "stuff." and delicious stuff it was.
Put up a large pot of water to boil.
Into a large flat pan, I put two chicken quarters- leg and thigh together. This was heated on a medium heat for a while, until both top and bottom were partially cooked, and much of the fat had rendered out. I then added water and a fair amount of lemon juice, covering the pan. Does the lemon juice do anything? Truthfully, I don't know. It certain,y can't be tasted, but the chicken tends to be more tender. I suspect that the acid helps to tenderize the meat, but I might be completely making this up. Whatever the case, continue to cook on a medium heat, flipping occasionally and adding water and lemon juice as needed.
Meanwhile, chop four medium sized celery stalks- not all the way on the outside of the bunch, nor in the core. Flavorful but tender. Before chopping,slice them through lengthwise. This allows the celery to lay flat while being chopped, and gives you smaller and more delicate pieces. Put into a large mixing bowl and put aside. Chop a small Spanish onion into small pieces and add to the celery. I wanted a little bit more green, so I also chopped the heart of some romaine lettuce and added this as well to the celery. Stick the bowl in the refrigerator until ready to use.
By this point, hopefully, the pot of water should be boiling. Dump in a box of spaghetti and crush it down to cook as normal.
Take a half to whole teaspoon of wasabi powder and combine with a few tablespoons of water. Set aside for a few minutes to allow the flavor to develope. Repeat with chinese mustard powder.
In another mixing bowl, combine two heaping tablespoons of mayonnaise, a squirt of lemon juice, wasabi, chinese mustard, a pinch of black pepper, a pinch of dill. After adding each ingredient, whisk until well combined. Taste and adjust as needed. It should be fairly liquidy and flow readily. You should have the flavor of the wasabi without the heat, acidity from the lemon, creaminess from the mayo, and all the flavors should be pretty harmonic. This is your "aioli" which I only call because it is easier to say than lemon wasabi mayo. stick this bowl into the refrigerator until ready to use.
The spaghetti should be done by now. Pour into colander to strain, and wash with cold water. Don't be afraid of using too much cold water. Dig in there with your hands and mix the spaghetti up, making sure there are no hotspots- mayonnaise doesn't play friendly with hot pasta. Once the spaghetti is cold- and I mean use the coldest water you can get from your sink- strain thoroughly and add to the bowl with the celery, onion, and romaine. Toss to mix the ingredients together. Pour the aioli over the spaghetti. Scrape some but not every speck of the aioli from the sides. Toss the aioli and spaghetti together until well combined (the spaghetti should have just a very thin coating of aioli, nothing too goopy) then put the bowl in the refrigerator.
By this time, the chicken should be done. Remove the chicken pieces to a cutting board. Remove any skin or fat and toss away. Cut away small chunks of the chicken and toss into the bowl with the aioli remnants. Take your time and get as much meat as you can. Once you are done, throw out the carcasses.
If you have taken your time and been thorough, the chicken will have cooled rapidly to warm at best if not room temperature- the high degree of moisture in a cool kitchen will drop the temperature like a stone. Toss the chicken in the bowl, allowing the chicken to get the last of the aioli off the sides of the bowl and getting an extremely thin coating. If you like, this can be served immediately or can go in the refridgerator for a half hour or an hour. Serve the chicken atop the spaghetti when ready to serve.

This was really something I threw together and ended up being really delighted. I wanted something both cool and refreshing, delicate in flavor. In the spring and summer, this would be something really nice to make, and I am very pleased about how well it turned out.
So, there's my pasta recipe.
Monday, March 19, 2012
We've just completed a house move from Hell so I haven't even managed to peek at this site for the past 2 months. But, installed in our new place and boxes amazingly all unpacked at last, I discovered Andrew's suggested Pasta recipe discussion/comments request.
I really like pasta, especially in warmer weather, but my husband doesn't. His list of approved pasta dishes is limited to Lasagne (British style) and grudgingly, linguine with a tomato, cream, chicken, & mushroom sauce. Suggestions to him of pasta related dishes are met with thundercloud scowls and
Le Sigh
I, on the other hand, coming from NYC and having lived alongside Italians (the RIGHT kind of Italians), love almost anything pasta with the exception only of those involving squid ink.
So while I know an enormous number of pasta recipes, I'm going to go with the one which by coincidence, I made this past Saturday: British Lasagne.
For those of you not from the UK who are now busily scratching your head and saying "Huh? British Lasagna?, this is a version of the Northern Italian style Lasagne I'm told. In the US, almost all the Italian Immigrants traditionally came from Southern Italy, especially Sicily. So in the US, we're used to the traditional Sicilian Lasagne - which we know and love. For our family variant, we make a Sicilian style lasagne but because I'm not a big fan of ricotta cheese, I leave that out and just use a bit more mozzarella.
So, essentially British Lasagne is layers of lasagne noodles filled with bolognese sauce (tomato meat sauce), bechamel sauce (white sauce), and parmesan cheese. Excuse me but that is simply bogus. And disgusting. And a sad waste of good pasta and if you made a yummy simmered red sauce, that's a sinful waste.
Thus, I created a compromise which is essentially my traditional family lasagne with white sauce topping the layers. It's different, it works.
I won't give the exact recipe now as I usually just make this by hand and I'm about to start cooking tonight's dinner. But I will return and add in some exact ingredient amounts for each of the parts of this dish. Experienced "by hand" cooks should be able to make this recipe anyway using the general outline I'll provide.
Lasagna Recipe
bake at 350 F or 180 C (fan)/200 C (conventional)
baking time: 45 min
Prep time - depending on if/how long you simmer the sauce, can be up to 4 hours
Ingredients for the bolognese sauce :
ground beef 10% fat
chopped onions
chopped carrots
chopped celery
chopped garlic
sliced mushrooms
canned chopped tomatoes in juice
red wine
virgin olive oil (or butter works)
thyme
sage
oregano
salt
pepper
Ingredients for the bechamel sauce
1/2 cup (8 tablespoons) unsalted butter
1/2 cup all-purpose flour
4 cups whole milk
1 teaspoon table salt
1 clove minced garlic
Freshly grated nutmeg, to taste
Freshly ground black pepper
1 lb shredded whole milk mozzarella (please don't use skim milk/low fat; it will turn everything watery!)
1 cup grated parmesan (Not a big fan so I used much less, maybe 1/2)
Lasagna noodles
To be continued...
Monday, March 5, 2012
New Recipes
The output on the blog has diminished in part, I think, because it is a great deal of work to try to present these recipes in the format we have them, taking pictures, etc. So after the recent e-mail from Tavie, it amused me that we all automatically had immediate and completely different responses.
So, I proposed that every week, we would pick an ingredient and briefly each of us would write up a recipe which features the ingredient. If we ever decide to expand on these recipes, that will be doable with what we publish as a base, and we can always add things like pictures later. But this would seem to be much more writer-friendly.
This week, we are doing strand pasta. Strand pasta is meant to be a broad catagory which includes things like spaghetti, linguine, and angel hair pasta.
Thoughts on Salmon
Tavie sent out a call on the Family hotline:
Help, cooks!
I was putting an order in on Fresh Direct the other day for some large staples that I don't feel like lugging from the store, and I noticed that there was a sale on salmon fillets. (Verlasso farm-raised salmon 8 oz steaks, to be exact.) So I got a couple for me and Sean.
Problemo: I've never cooked salmon before.
So: how do I cook these things? I don't have a grill. I have a stove/oven, and a bottom broiler (that I'm not sure works - the last time I used it I got some steaks about 1/3 way cooked before the whole thing just shut off and I haven't tried it since.)
What's the best way to get some flavor out of these things with the tools I have at my disposal? And should I marinate them in something? (What?) How long do you cook 'em? Should I roast 'em? Bake? Poach? Pan-fry? Take them to Andrew's and make him grill them for me? (HAHA)
I could look up a recipe on the internet but I'm going to my personal experts first.
-- Tavie (rhymes with GRAVY)
Mom, Andrew and I replied the following:
From Mom:
Marinating fish is always a problematic issue because it's all too easy to overwhelm the fish flavor itself. But it's easy enough to do; just pop the fish into a zip-lock baggie and add a bit of sherry, rice wine vinegar, chopped herbs, lemon zest (your choice from the list) seal the bag and let it rest in the fridge for an hour or so. To cook - grill or pan fry.
Pan frying is dirt easy - a bit of butter and brown gently on both sides. Fish needs to be cooked through but not overcooked such that it separates into flakes by itself.
I tend to cook 3 min on a side for pan frying or 5 min if the piece is thick. In general, I cook salmon as plainly as possible - ie quickly pan fry in some butter. Then I top with unsalted butter and squeeze lemon juice on top. Or I ladle on some bernaise sauce which is sold fresh, ready to use in supermarkets here.
You can also easily make gravlax with salmon fillets in a glass dish (like a pyrex pie plate). Mix 2 parts sugar to 1 part salt (NON-iodised) ie 1/2 cup salt to 1 cup sugar (you don't want to end up with too salty fish). Sprinkle on bottom of glass dish, place 1 fillet in the dish skin side down (if skinless, formerly skin side down). Sprinkle a bit of ground pepper on the salmon and then a lot of the salt/sugar mix. Place a bunch of fresh dill on top (you can use dried dill but it's not as nice). Pat plenty of the salt/sugar mix on the 2nd fillet and pace that face down on the dill (ie skin side up). Sprinkle the remaining salt/sugar mix on that. Cover with saran wrap/cling film and place a flat plate on top of that. Add a heavy weight to press the whole thing down - a few large cans works well. Twice a day, remove the weights and saran wrap, flip the whole bundle of fish and dill over and put back the saran and weights. That helps it cure evenly. The gravlax is ready in 3 days depending on the thickness of the fillets. You'll see the texture of the fish change. So, when you are ready to serve, just scrape off the dill and other bits and wipe dry with paper towels. Place on a clean cutting board and using a very sharp knife held at an angle, slice very thin, flat slices - then eat!
This is a useful recipe site as they have photos and sensible instructions: http://www.cookingforengineers.com/recipe/132/Gravlax
Remember that recipes are just guides, not the law ;)
From Asti:
Further to my mother's recipe for pan-frying, if there is skin on your
salmon then fry the skin side first until it crisps a bit. I like to
do that and then use the fish in a salmon nicoise (lovely in the
summer). That would be salad leaves, green beans, hard boiled egg,
tomato, boiled new potatoes, black olives, some anchovies if you like
and serve with a nice vinaigrette.
To poach i put butter and white wine and some dill and juice of one
lemon in a pan. Maybe add a bay leaf. It should be enough to come to
about halfway up the fish but you want to bring the liquid to heat
before you add the fish. Liquid shold be almost ready to simmer when
you add the fish skin side down. Keep at this heat and let poach for
~15 minutes. You may want to add some baby asparagus when there is
5-10 minutes left. Note: no need to turn and it is quite normal for
the skin to pull away in the pan when you lift to serve.
I would serve with hollandaise sauce and boiled new potatoes.
And from Andrew:
Preheat the oven to 350. Slice a bunch of lemon rings and coat the area the salmon will sit on in the pan/cassarole dish/whatever. Place salmon atop lemon. Cover top of salmon with a few more lemon slices, but not completely covering it- just a few. Seal whole pan in aluminum foil. Place salmon into oven. Bake for about 10 minutes per inch thickness. Five minutes before finishing, take salmon out of oven. Remove foil. Remove lemon slices from top. Heap spinach on top of salmon. Put foil back on. Place salmon back into oven. Let salmon cook the remaining 5 minutes, potentially slightly longer since the salmon may have cooled while out of the oven. Do you have a meat thermometer? Worth buying. Anyway, the spinach will have wilted and stick to the top of the salmon, looking almost like a green glaze. Remove salmon from the oven and enjoy.
Variants can include putting a little bit of white wine in the bottom of the pan to help keep the salmon moist and flavor it.
Friday, March 2, 2012
Kangaroo Tenderloin
Yes, you read that right. I made kangaroo tenderloin medallions tonight. No, they aren't difficult to make at all, although you need to keep on your toes.

Kangaroo is not domesticated, but instead is still hunted in the wild. The reason is simple; they die when attempted to be herded. Still, when you look at the meat, it is fairly astonishing. As you can see above, the color is a very livid purple. About the only way I can describe it is it is like dark meat on fowl. And this is the tenderloin no less.
I'm going to say this again, but it can not be stressed enough. Kangaroo is exceedingly lean. Look at the pictures I post here- show me one tiny piece of fat. There isn't any. Well, technically there is, but it is easily under 3%. This is about as lean as it gets.
Now, you see that purple, you hear about kangaroo, you worry about gameyness and flavor, right? Well, you don't need to so much. The gameyness flavor comes from two factors- the age of the Roo and the length of time since it was killed. Most butchers will have the meat frozen, which means that the length of time is no longer an issue. And hunters pretty much go for the young Roos, so that isn't a big deal either.
I'm not one of those people who like gamey meat. I had no problems with kangaroo. The flavor is almost exactly that of a very nice steak. Almost. There is a subtle background hint of a flavor which is different, but many people simply will not be able to tell the difference. Which is fine, as kangaroo meat is actually extremely healthy.
So, you have your kangaroo tenderloin medallions, you are reassured about the gameyness factor, you just want to eat the fucking things. Now what?
I set the medallions on a plate and poured all the extra juice I had over them. Then I sprinked salt on top of the meat. You see I had a fair amount of meat. For this, I sprinkled three generous pinches of simple Morton's salt. Why no sea salt? I don't have any at the moment.
I set the meat aside on the counter and left it alone at room temperature for five hours. You can eave it overnight in your fridge if you cover it. This allowed the salt to draw moisture out from the meat, form a brine, then become re-absorbed by the meat, flavoring the meat all the way through. Plus, the extra juice I poured on top was also almost completely absorbed. After five hours, the top of the meat was dry to the touch, but that is okay.

I heated my griddle with a generous amount of olive oil spread onto the grill. Again, I emphasize the leanness of the meat. Because of this, the meat will dry out if you are at all careless with it. This is a meat which can NOT be cooked past medium at the most, but really should be cooked to rare/medium rare.
But how to achieve this best? The secret is frequent flipping. Yes, they always tell you to flip only once. You know what? That's bullshit. Complete and utter bullshit, as you will see in a moment. Flip as much as you like. These tenderloin medallions were flipped around once per minute. This allowed them to cook from both sides at the same time.
Note: the top of the steak where the salt was sprinkled will be a darker bluish-purple, while the bottom will be redder, as seen in the above picture. While cooking, that bluish-purple color does not necessarily go away 100%. Do not be fooled into thinking that this means that the meat is still raw. Just keep flipping.
I cooked these for a total of roughly ten to fifteen minutes. Yes, I know that is a large range, but I don't remember exactly the time. Plus, my grill isn't exactly even of heat, so if you have a better setup, ten minutes should be fine.

Your beautifully cooked steaks will need to rest a full ten minutes. As always, don't fuck around with that time- it allows the juices to flow from the interstitial spaces back into the cells, keeping the meat juicy and moist.
The final product? See for yourself:

Only needs to be flipped once? Fuck you. That is one of the most beautifully rare steaks I have ever eaten in my life.
Friday, January 6, 2012
(Mostly) Around The House Stuffed Peppers
I've wanted to make stuffed peppers for a while now, haven't made them in years. As usual, I don't have everything that I need, but I put together what I had from around my kitchen- mostly. I say mostly because I did go and buy the peppers and the chopped meat especially for this dish.
You will need:
several teaspoons salt
several teaspoons pepper
1 cup white rice (I use Basmati)
several tablespoons of butter
water
6 bell peppers (traditionally green, I used a mix of green and yellow because they only had two green left.)
1 small onion
1 clove garlic (I used a clove of smoked garlic, which was all I had)
1 tiny can of tomato paste
~1.5 pounds of chopped beef
oregano (about a teaspoon, dried)
basil (about a teaspoon, dried)
1 egg
Worcestershire sauce
First thing's first. Preheat your oven to 350 degrees. Have a large casserole dish (large enough to fit all of your peppers upright inside) on hand. Put a fairly large (6 quart) pot of salt water on the stove to heat. Note that this should be fairly lightly salted, you don't want it to be salty like you make pasta in- it will turn your pepper into pimento if you do that.
I recently figured out a trick when it comes to rice. I hate washing rice. It's not that its hard, but it takes forever, your hands get pruney, and you're never quite certain that you've gotten all the starch washed off. Here's the trick. Get a large, deep mixing bowl. Deep is important. You don't want one of those shallow but large ones. Just a big, classic deep mixing bowl. Put one cup of rice in the bowl. Stick the mixing bowl in your sink, under the faucet. Aim the faucet into the middle of the rice and turn the faucet on, hot. Why hot? Because starch is more soluble in hot water than cold. What *should* happen (and you will need to shift the bowl/faucet around) is the water will hit in the middle of the bowl and spread out and come up the sides. A current will be set up so that the rice will flow with the water in a cycle, constantly rinsing it, no need to stick your hands in. After a few minutes, the water should run clear. Bam, you're done.
Wash 1 cup of rice and drain. Add it to 1 1/2 cups (there will still be a little water left in the rice, which is why I don't say 1 3/4 cup) water and a tablespoon of butter in a medium saucepan and put on a high heat until boiling. On boiling, turn the heat down very low so it just simmers and cover tightly. After 10-15 minutes, it should be dry. Fluff with a fork and set aside.
While the rice is cooking, cut the tops off of the bell peppers, putting the edible parts of the tops aside, and clean the insides of membrane and seeds. Once all six are done, place them into the pot of water. Hopefully you didn't take too long about this, so the water should still be pretty cool. This will be brought to a boil and allowed to boil for five minutes. However, this much water takes a long time to get to a boil, so by the time the peppers are ready to be fished out, you should be ready to use them.
Take the edible parts of the top of the peppers and chop them up. Also chop the small onion, and the single clove of garlic (chop this fine but no need to mince it, or you can crush it if you like). In a frying pan, melt two tablespoons of butter. Add the peppers, onion and garlic and stir them a little to make sure everything is nicely coated and cook for five minutes until tender. Add the tiny can of tomato paste, re-fill the can with water and add the water to the frying pan. Stir until the tomato paste is evenly incorporated into the vegetables. Add a teaspoon salt, teaspoon pepper, the oregano and basil and stir. Let that sit with an occasional stir for 5 minutes or so- you want it to be thick, but not play-doh thick. Like a good tomato sauce in thickness.
In another mixing bowl, whip the egg until fluffy. Add 1 teaspoon salt, 1 teaspoon pepper and whisk it together. You want to add the Worcestershire sauce now. How much? I add a tablespoon or two- but I have low sodium, so if you have regular you may want to add less. Just use a few generous dashes, you should be fine. Add the chopped meat and the rice (should be finished cooking by now). Use a lean chopped meat, you don't want lots of fat oozing through the peppers, making it greasy. Add half of the tomato-mixture from the frying pan. Mix by hand. As with all chopped meat, you don't want to over-mix it, but you want it fairly homogeneous. It won't take too long.
Fish the peppers out of the water and put them upright in the casserole dish. Fill them with the meat mixture by hand- you can add it in without touching the pepper if the pepper is still really hot. Top with rest of the tomato mixture.

Pop into your hot over for an hour, then take out and let cool. Eat and enjoy! Hands down best stuffed peppers I've ever had. And the yellow peppers? I'm never going back to green again, much sweeter and more flavorful!

Edit: I made an absolutely enormous batch for a party last night and found something interesting- the amounts don't seem to scale linearly. I made a little over three times the number of peppers (red, yellow, and green) and made three times as much filling, but had enough for a good 4-5 more at the end. I'm not really sure why this is, but the green peppers I got were a little bit on the small side. So, I guess, look at this as working for fairly large bell peppers.
Subscribe to:
Posts (Atom)